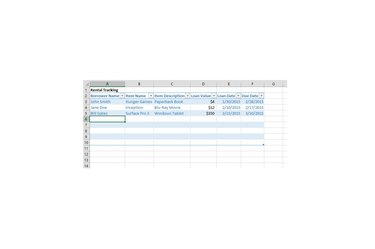
You can keep track of your personal or business rentals in Microsoft Excel 2013 by creating a custom table. While Excel provides you with a variety of free templates, creating your own rental tracking worksheet lets you custom-tailor your table data to meet your needs. After you've entered the column headers for your table, add each of your rental items as new records on each row. You can sort your completed worksheet using the down-arrow associated with each of your column labels.
Step 1
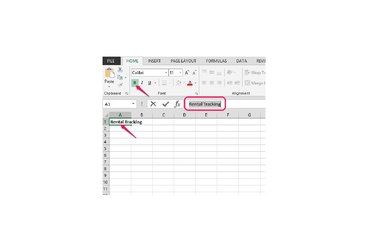
Open a blank workbook in Microsoft Excel and enter the name for your worksheet into cell "A1." For example, enter "Rental Tracking." Select the text and then press "Ctrl-B," or click the "B" in the Font group of the Home tab, to emphasize the title.
Video of the Day
Step 2
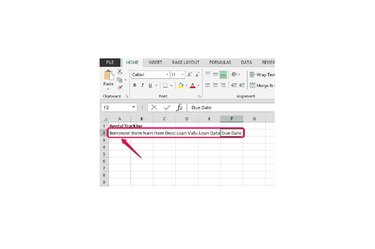
Enter "Borrower Name" into cell "A2" and then press "Tab" to move to the next cell in the row. Repeat the process to enter each of your column data labels, including "Item Name," "Item Description," "Loan Value," "Loan Date," and "Due Date." Add any additional data labels you need to track.
Step 3
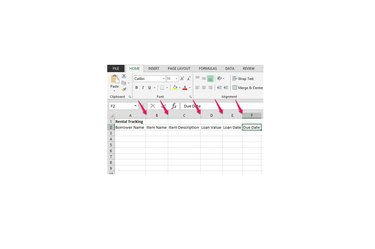
Double-click the separator line between the header for column "A" and "B" to automatically increase the column width to fit your text. Repeat the process for the remaining columns containing your labels.
Step 4
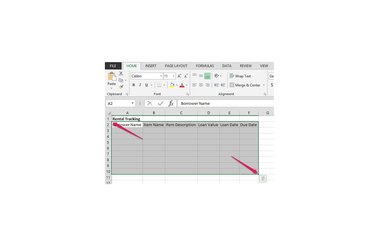
Select the range of cells that make up your table -- including the empty rows where you will enter each record. For example, select click into cell "A2" and drag your selection to cell "F10."
Step 5
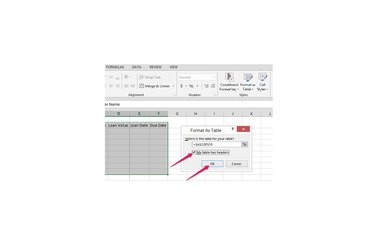
Click the "Format as Table" drop-down button in the Styles group of the Home tab and then select a table style. For example, select "Table Style Light 2," which is the second option in the first row under Light. Check the "My Table has Headers" box and then click the "OK" button.
Step 6
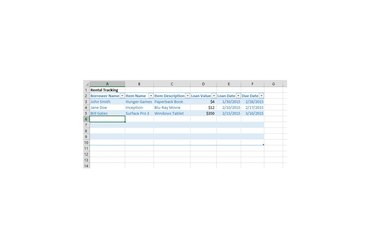
Enter your rental tracking data records into the remaining rows of your spreadsheet, pressing "Tab" to move to the cell to the right and "Enter" to move to the first cell in the row below.
Step 7
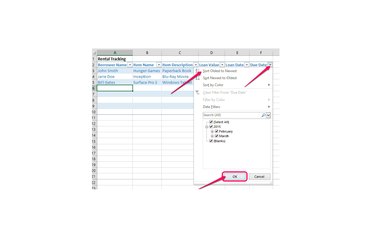
Click the down-arrow to the right of one of your column labels to open sorting options for your table. For example, to sort by due date, click the "Due Date:" down-arrow and then select "Sort Oldest to Newest" or "Newest to Oldest" and then click the "OK" button.
Video of the Day