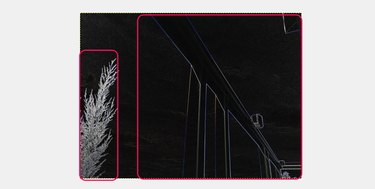
GIMP includes several tools that outline images in various ways. Depending on the effect you want, you can use borders, add a 3D outline, or choose from a variety of algorithms to detect edges within an image and shade them.
Make a Border
Video of the Day
Step 1
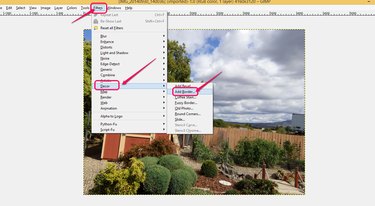
Open the image you want to work on and click "Filters" on the menu bar. Choose "Decor" in the drop-down list. Select "Add Border..." to see border options.
Video of the Day
Step 2
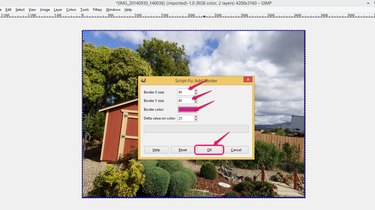
Set values for the size and color of the border. Borders can range in size from zero to 250 pixels wide. Also, borders are automatically shaded based on their color to give the image a raised appearance. The Delta value determines the degree of shading -- GIMP separately calculates the actual color applied to each side of the border by plugging the Border color and Delta value into a unique formula for each side of the image. Increase or decrease the Delta value within a range of zero to 250 to change the degree of shading and appearance of the border. A value of zero results in no shading. Click "OK."
Step 3
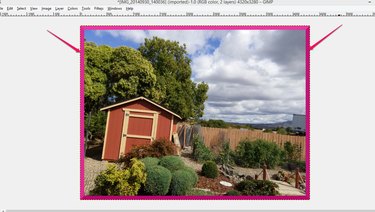
Check the picture after you complete the settings. The border is added to the outside of the original picture. Reopen the "Add Border..." option to adjust the size, color and Delta values as necessary.
Make a 3D Outline for Text
Step 1
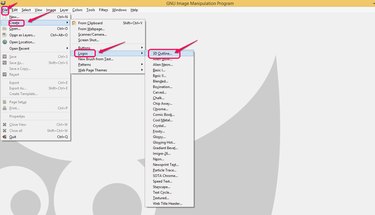
Click "File" and then "Create." Select "Logos" and choose "3D Outline..." to set up an object.
Step 2
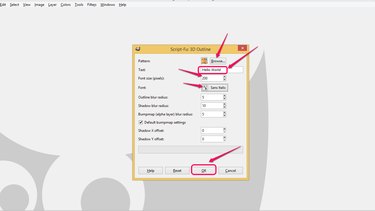
Click "Browse..." to choose a pattern for the 3D outline and type your text. Enter the Font size and choose the Font style. The border includes a shadow effect, and you can adjust the blur radius for the border and shadow. Higher values smear them. GIMP uses a Bumpmap to emboss your text and create the 3D effect. A high Bumpmap blur value reduces the 3D effect, spreading out the embossing. Leave the default Bumpmap settings box checked unless you are familiar with setting up parameters for a new Bumpmap. Finally, you can offset the shadows if you choose. Click "OK" to finish.
Step 3
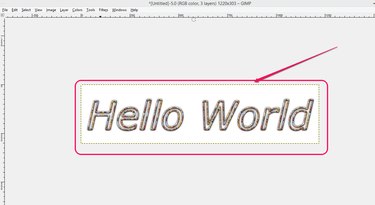
Check the 3D object you designed and readjust the settings as necessary.
Outline Objects with Edge-Detect
Step 1
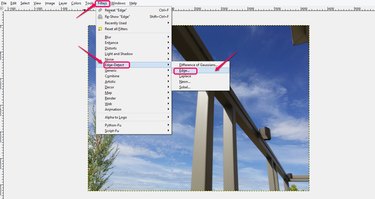
Open your image file and click "Filters." Choose "Edge-Detector" from the drop-down list. GIMP includes a wide range of selection options that can outline various elements in your image for a neon effect.
Step 2
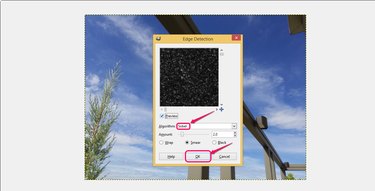
Choose "Sobel" as an example. Sobel detects edges between colors in images, focusing on vertical and horizontal borders. The Amount slide allows you to choose whether the edges of the outlines are thick or thin, and how much darkness is in the image. The radio buttons determine the pixels used for image boundaries; generally this should be left as the default, "Smear." Click "OK" to apply the changes.
Step 3
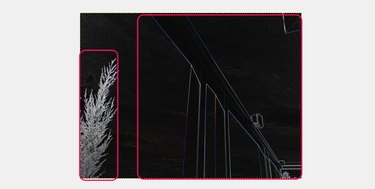
Check the results to see the outlines of the objects in your image. Go back and experiment with different Edge-Detect filters and settings. The example using the "Sobel" choice in "Edge" results in a dark background with light outlines, as shown. A "Difference of Gaussians..." filter with "Invert" selected, however, would display a white background with dark or colored outlines. Each option detects and displays edges slightly differently.