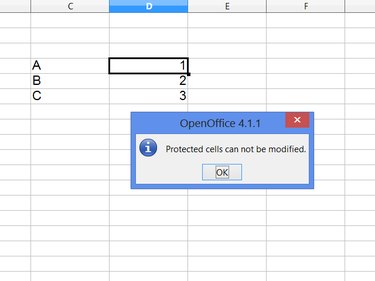
By default, a protected spreadsheet in OpenOffice Calc 4 protects every cell, preventing anyone from editing their contents. To unprotect specific cells on the sheet, you first need to turn off protection for the entire sheet. Set the specific cells to not use protection, and then re-enable sheet protection on the rest of the sheet.
Step 1
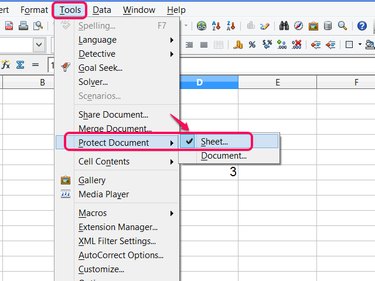
Open the Tools menu, point to Protect Document and uncheck Sheet. If the spreadsheet's creator locked the sheet using a password, you'll need it to turn off protection.
Video of the Day
Step 2
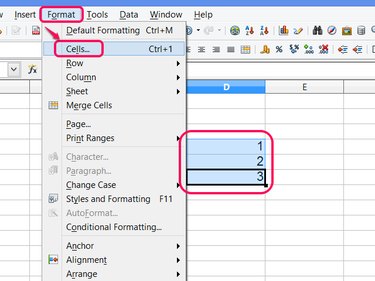
Select the cells you want to unprotect by clicking and dragging, clicking a column or row header, or holding Ctrl while clicking each cell. Open the Format menu and click Cells to format the selection.
Step 3
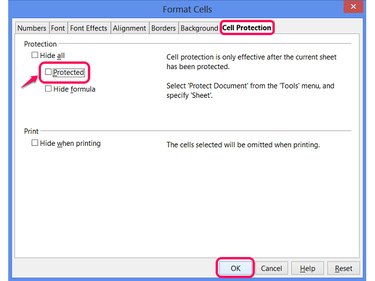
Turn off Protected on the Cell Protection tab and click OK.
Step 4
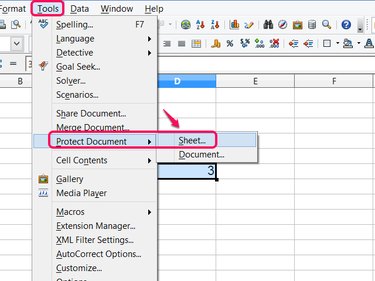
Reopen the Tools menu and click Sheet in the Protect Document section when you're ready to reprotect the rest of the spreadsheet.
Step 5
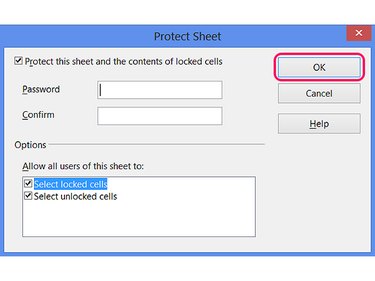
Enter a password if you want one, and click OK to turn on protection. The cells you formatted remain unprotected and editable, while the rest of the sheet locks down.
Video of the Day