Microsoft Excel 2013 automatically inserts page breaks into your worksheets based on its current settings, such as the margin, paper size and scale options. The Page Break Preview view helps you identify the page breaks for your current worksheet, and you can use the Insert Page Break command to manually insert page breaks. You must select the cell where you wish your new page to begin before you manually insert a page break. Page breaks affect how your worksheet separates pages for printing.
Step 1
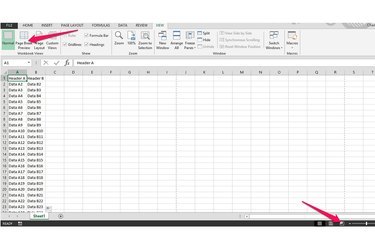
Open the Excel worksheet you wish to edit. Click the "View" tab and then select the "Page Break Preview" command in the Workbook Views group. Alternatively, click the Page Break Preview button, resembling a square with two rectangles inside, on the status bar below your worksheet. Click "OK" if the "Welcome to Page Break Preview" dialog box appears.
Video of the Day
Step 2
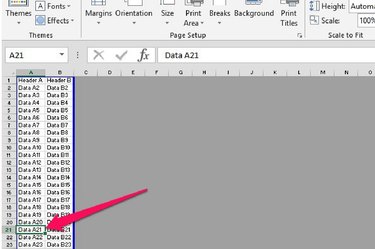
Select one of the cells in the row below, or the column to the right, where you want to insert a page-break. For example, if you want to add a horizontal page break to your spreadsheet, select a cell in the row you wish to use as the first row of your new page.
Step 3
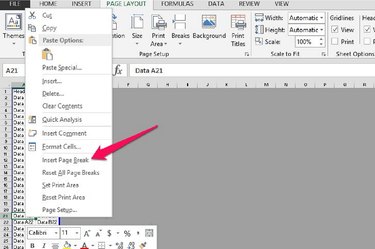
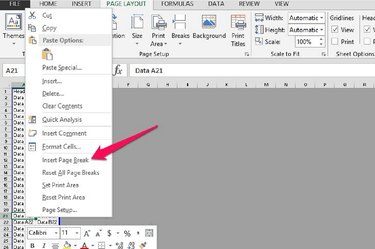
Right-click the selected cell and then select "Insert Page Break." Alternatively, click the "Page Layout" tab, the "Breaks" drop-down button in the Page Setup group and then select "Insert Page Break." Your new page break is marked by the solid blue line. Repeat the process to add additional page breaks to your worksheet.
Step 4
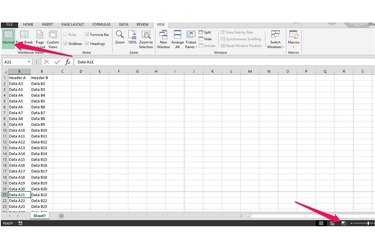
Click the "Normal" command in the Workbook Views of the View ribbon. Alternatively, click the "Page Break Preview" button, resembling a square with two rectangles inside, on the status bar below your worksheet. A solid line marks the page breaks you manually inserted.
Video of the Day