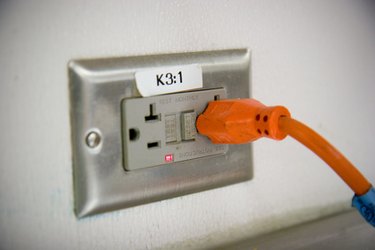
Changing a 220-volt outlet to 110 volts involves installing new outlets, breakers and electrical cable. The cable for 110 volt will only have three wires, as opposed to the four, for the 220-volt outlet. Converting this over will allow you to run your more typical household devices, such as fans, lights and electronics. Be sure to consult a licensed electrician before beginning any electrical project.
Step 1
Turn the main power switch off at the circuit panel. Loosen the screws in each corner of the panel, and remove the panel.
Video of the Day
Step 2
Locate the 220-volt outlet to be changed. Remove the screws holding the cover over the outlet. Loosen the screws holding the wiring and outlet to the wall, and remove both. Cut the wiring next to the wall, and push any extra wire into the wall.
Step 3
Hold the new outlet box against the wall, where the previous outlet was mounted and trace the outline onto the wall. Carefully cut a hole along the outline, large enough for the box to slide into.
Step 4
Drill a 1-inch hole (from the attic), into the top of the wall cap to allow access to the inside of the wall cavity. Drill the hole directly over the location of outlet. Feed the fish tape down the wall, and have an assistant pull it out the outlet hole. Attach one end of the new cable to the fish tape using the electrical tape. Pull the cable up the wall till there is only eight inches left hanging out the wall.
Step 5
Poke the end of the cable from Step 4, down a preexisting hole over the circuit panel. Use a hole where the other electrical cables from the house are fed down to the panel. Have an assistant pull the cable out the front of the panel as you feed it down the wall. Leave 18 inches hanging out the panel and cut away any extra cable.
Step 6
Strip off 10 inches of the outer sheathing on the end of the cable at the panel, and 4 inches off the end at the outlet. Strip off 1 inch of insulation off each insulated wire inside the cable, at both ends.
Step 7
Twist out one of the knockout holes in the back of the outlet box. Run the cable through the the hole and out the front of the outlet box. Insert the box into the hole that was cut earlier. Secure the box to the wall using the screws to tighten it down.
Step 8
Attach the wiring to the outlet, by tighten each screw on the outlet down on the wires. Connect the black wire to the brass screw, the white wire to the silver screw, and the bare wire to the green screw. Line up the holes on the outlet with the holes on the electrical box and insert a screw into each one and tighten it down. Insert a screw into the center hole of the outlet cover, and tighten it down to secure it to the outlet.
Step 9
Locate the 220-volt breaker, in the circuit panel, that is connect to the outlet being replaced.
Step 10
Loosen and remove the black and red wires from the breaker, the white wire from the neutral bus and the bare wire from the ground strip. Cut the cable as close as you can to where it enters the circuit panel. Turn the 220 breaker off and label it unused.
Step 11
Slide the 110v breaker into an open bay, push the two U-shaped clamps down onto the the pins inside the slot until you hear it click and lock into place.
Step 12
Connect the new wiring to the new breaker. Connect the black wire under the brass screw on the breaker, connect the white wire to the neutral bus strip and connect the bare wire to the ground strip. Tighten each screw down on the wires.
Step 13
Replace the cover panel and insert a screw into each hole and tighten it down. Turn the main power switch back, and the new breaker to the on position. Plug in a light to the new outlet and test for power.
Video of the Day