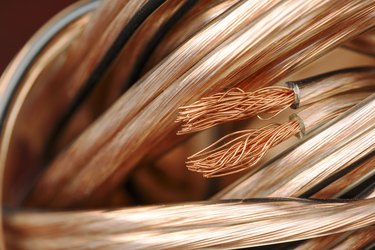
Attaching a set of speakers to a stereo is usually pretty straightforward as long as they have the same connections. It gets trickier when you're attaching speakers with wires to a stereo with RCA jacks for the speaker out, or a stereo with terminals for regular speaker wire to speakers with RCA jacks. You won't find a speaker wire-to-RCA adapter, so you have to either buy speaker wires with RCA plugs at one end or make your own. Making your own isn't hard, and it keeps you in control of the quality.
Choosing Your Pieces
Video of the Day
Some speakers have their wires permanently attached, but usually, you can choose both your speaker wire and connectors. Wire size is given in "gauge" measurements, and the smaller the number, the bigger the wire. That means 10-gauge wire is huge, and 26-gauge wire is fine. Big wire is best for long runs, and enthusiasts love extra pure, oxygen-free speaker wire, but for most living rooms, ordinary wire of 16- to 20-gauge is fine. After you settle on the wire, you need to select a set of RCA plugs. Choose plugs that accept the gauge of wire you selected. It's maddening to start soldering and discover you can't fit the wire into the plug. The plugs themselves range from inexpensive plastic to heavy-duty, gold-plated brass. If you opt for premium wire, get premium RCA jacks. If you picked inexpensive wire, pick inexpensive connectors, too.
Video of the Day
A Quick Look at Speaker Wire
Stereos use two wires per speaker to carry the sound, one positive and one negative. If you take a close look at your speaker wire, you'll see that it always differentiates between the two wires in some way. You might see a solid stripe on one wire's insulator, for example. It might also be a ridge you can feel with your fingertips or a line of plus signs. One wire might even be a different color than the other. That's so you can tell the two wires apart and connect them the same way at each end. The polarity is important. If you connect both speakers the same way, you get the rich, full sound you're looking for. If you connect them with different polarity, they cancel each other and give you poor sound.
RCA Cable Polarity
The standard RCA connection makes two electrical contacts. One is at the pin that sticks out of the connector, and the other is on the ring or the shield. When you're attaching the speaker wire to RCA plugs, you can connect either the marked or the unmarked side of the wire to the pin, whichever makes sense for you. As long as you do all the wires the same way, they'll have the same polarity. It makes a difference when you plug in your finished speaker because the contact on the outer ring is always considered to be the ground. Whichever wire you connect to that contact should always go into the black terminal at the other end.
Soldered or Solderless
There are two kinds of RCA connectors you can choose from: soldered or solderless. The solder type has two contacts inside, one for the pin and one for the sleeve, where you can readily solder a wire. Solderless RCA plugs typically have either crimp-on connectors for the two wires or small set screws that can be tightened down onto the wire. The solderless type requires minimal skills and tools. You need a wire stripper or small knife to remove the insulation and then a pair of needle-nose pliers to crimp the crimp type or a tiny jeweler's screwdriver for the set screw type. The soldered variety requires a bit more skill.
Soldering Speaker Wire to RCA
You still need a knife or wire stripper for the soldered type, but you also need a pencil-type soldering iron, a heatproof surface or stand where you can set the soldering iron down, and ideally, a small fan to blow the mildly toxic solder fumes away from your face. You can use the same rosin-core solder you'd use for any other electronics, although silver solder gives you the best results. Start by stripping the wire and twisting the ends together to keep the strands from fraying. You might find it helpful to "tin" the ends of the wire by applying a small amount of solder to hold the strands together, like the plastic tip on a shoelace. Drop the outer sleeve of the RCA plug over the wire. Hold one wire to the center pin connector, heat them with the soldering iron, and then apply a small bead of solder. Repeat with the second wire and the ring connector. Then, slide the outer sleeve up over the innards of the connector and snap or screw it into place.
Care When Soldering
Even a low-wattage pencil soldering iron gets hot enough to cause a serious burn, so you need to take a few precautions when you're working. First, make sure the work surface is clear of obstructions that could make you fumble the soldering iron. Shoo any kids or pets out of the room, too. The last thing you need is a curious pup, kitten or toddler deciding to tug on the cord. Keeping your fingers clear of the iron itself and the work area is only common sense, but there's also the risk of a drop of molten solder landing on your fingers or tabletop, and the wire itself can get surprisingly hot if you're holding that in your fingers. Hobby stores sell useful stands with alligator clips to hold your work so you can solder hands-free, and they're a good investment if you like to tinker with electronics.