With a free Microsoft account, anyone can create a professional-looking survey without being an expert in Excel. When you create a survey in your free OneDrive account, Excel Online guides you through the process to customize it for your needs.
Depending on the Response Types you select, participants can check the answers to each question, select Yes or No, or enter text, dates or numbers. Survey results are automatically added to a single Excel worksheet, which you can edit, sort and filter as needed.
Video of the Day
Video of the Day
Starting a New Survey
Step 1
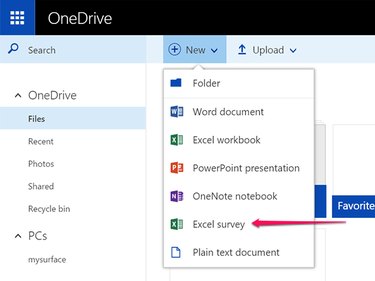
Go to Microsoft OneDrive and log in. If you don't have a Microsoft Account, follow the onscreen instructions to create one for free. Click the New icon and select Excel Survey. Excel Online opens in a new browser tab.
Step 2
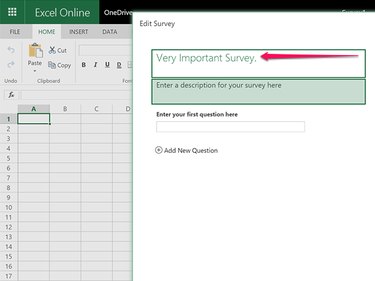
Type a name for the survey in the Title field. This is displayed to everyone who receives it and is used as the file name when you save it in OneDrive. Enter a description, if desired, in the Description field.
Step 3
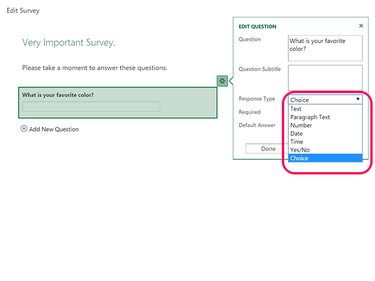
Click the First Question field. A dialog box opens in which you enter a Question and Question Subtitle, and then choose a Response Type. To make a question required, click the Required check box and select a default answer for each question, if desired. Response Type options include:
- Text, for a short text answer.
- Paragraph Text for longer answers.
- Number for decimal numbers, percentages or currency.
- Date
- Time
- Yes/No
- Choice for multiple choice items.
Using Different Response Types
Text and Paragraph Text
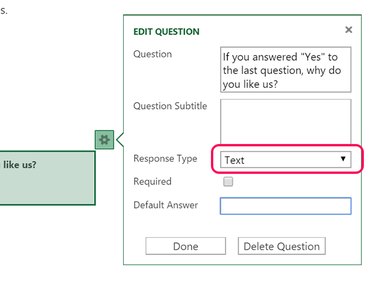
Select either the Text or Paragraph Text response when you want survey participants to be able to enter their own answers. Either is a good choice, for example, when you want unstructured feedback in the survey, or if you're asking for recommendations about a topic. Other than providing your recipient the ability to press Return to add more than one paragraph, there is no difference between these two response types. Excel lets anyone enter up to 32,767 characters in a single cell.
Number
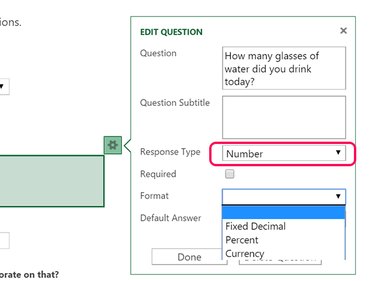
The Number option allows survey participants to enter any number as an answer to a question. Use the Format menu to specify if the number should be a Fixed Decimal, a Percent or a Currency. You can then specify the number of Decimals for each of these formats.
Date and Time
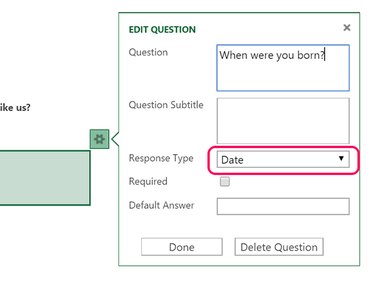
The Date or Time option ensures that all survey participants use the same format for their answers, which makes it much easier to sort and compile your data in the worksheet. If you select the Time option, select whether or not you want seconds included in the time.
Yes/No
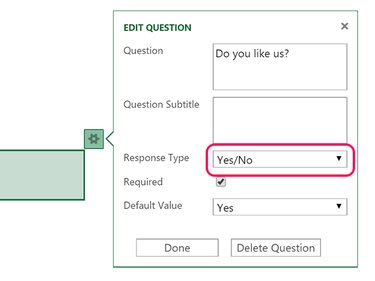
The Yes/No Response Type is pretty straightforward. Participants select either Yes or No as an answer.
Choice
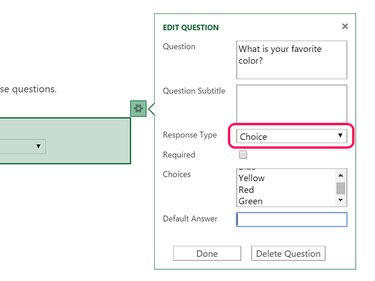
The Choice Response Type allows you to specify multiple choice answers for a question. Type at least two responses in the Choices field.
Sharing and Using the Survey
Step 1
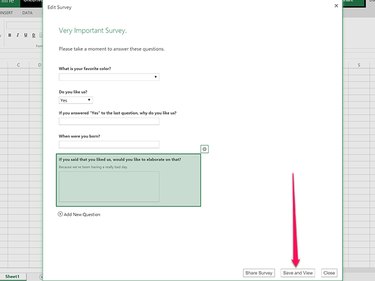
Click the Save and View button when you have entered all of your questions. The file is saved to OneDrive using the title you entered earlier. A preview of the survey appears on the screen, exactly as it appears for the participants.
Step 2
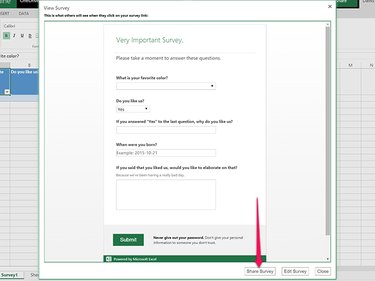
Proofread the survey and check each of the responses. To make a change, click the Edit Survey button. If you're satisfied with the survey, click the Share Survey button and then click the Create Link button.
Step 3
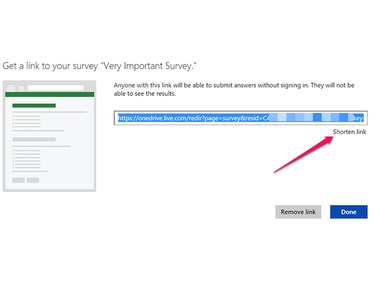
Copy the link as it appears on the screen, or click the Shorten Link link to create a shorter one. Click Done. The Survey window closes, revealing the survey's Excel worksheet in View mode.
Step 4
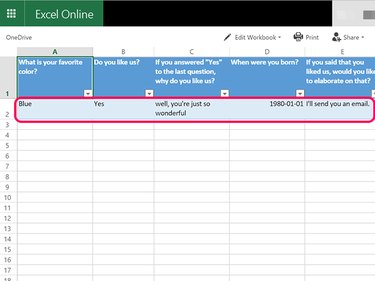
Email the link you copied to all of the survey participants. When they click the link and complete the survey, the results will be added as a new row to the spreadsheet, which you can view at any time from your OneDrive folder. In View mode you can sort and filter the responses by clicking the small icon in the bottom corner of each question.
To share the survey workbook with others, click the Share icon. Participants don't need a OneDrive account to answer the questions. Note that the Share links generated here don't share the survey questionnaire, only the workbook containing the survey's worksheet.
Step 5
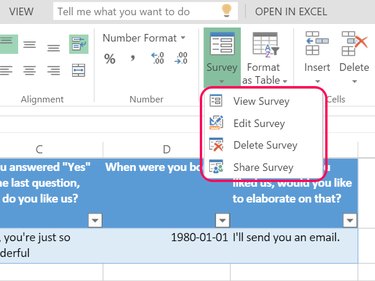
Click the Edit Workbook icon to make changes to the survey worksheet. If you click the Survey button that appears in the Home ribbon after going into Edit mode, you can view the survey questionnaire, edit the survey, delete it or get the Share link again.