Whenever you have additional information that you want to provide your audience outside of your PowerPoint presentation, just add an appendix. A PowerPoint appendix is similar to the appendix found in a book, in that the information is normally helpful to the audience, but it isn't vital to the main content. You can hide the appendix from the slideshow, while making it available to the audience in PDF file or printed handouts.
An appendix is ideal when your allotted time doesn't leave room to discuss all of the material you have to offer, or if you have information that only a portion of your audience is interested in. An appendix can include additional material such as the following:
Video of the Day
Video of the Day
- maps or diagrams
- Web links that provide additional content
- a list of contacts
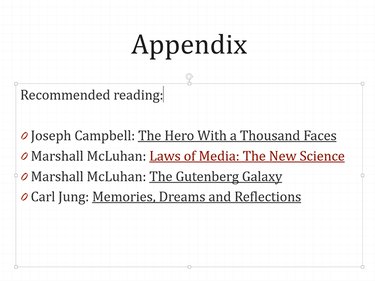
- a suggested reading list
Adding an Appendix
Step 1
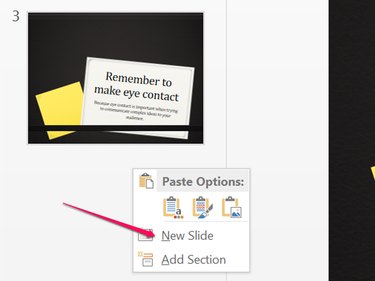
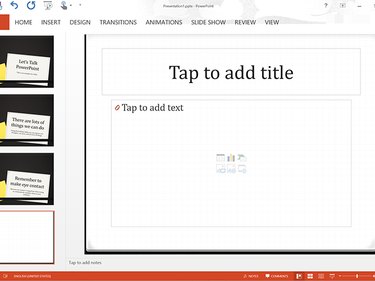
Right-click the empty space below the last thumbnail in your presentation. Select New Slide from the drop-down menu. A new slide opens with two text boxes.
Step 2
Type "Appendix" in the Title box. Type the material for your appendix in the Text box. If you want to include pictures or diagrams, use the Insert tab options just as you would for any other slide. To add clickable website links, select Hyperlinks from the ribbon under the Insert tab.
Step 3
Format the text as desired, using the Home menu options or by right-clicking the text and using the drop-down menu. If you need more room, insert as many slides as you need. You can delete the title on subsequent slides, or use "Appendix (cont'd)" if you prefer.
Hiding and Showing an Appendix
While your audience should get a copy of the appendix in printed handouts, it's not normally a part of the slideshow presentation itself. Hiding the appendix slides removes them from the slideshow, while still giving you the option to call them up if needed.
Step 1
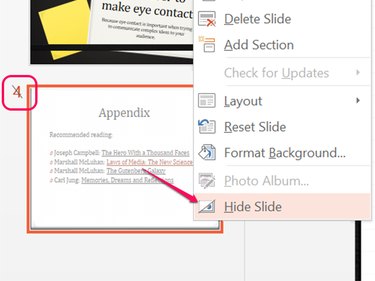
Right-click the appendix thumbnail and select Hide Slide. A line appears over the slide number, indicating that it's hidden. To reveal the hidden slide, right-click the thumbnail and select Hide Slide again.
Step 2
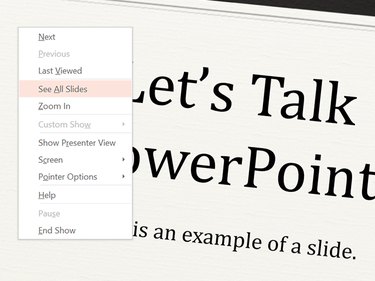
Right-click the currently displayed slide during a presentation if you want to show a hidden slide. Select See All Slides.
Step 3
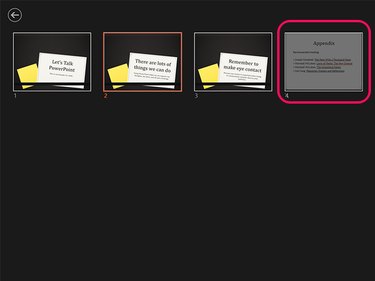
Click the grayed-out slide. It is immediately displayed on your viewing screen.
Printing an Appendix
When you export a presentation to Word as a handout, you'll see that hidden slides are included in the Word document.
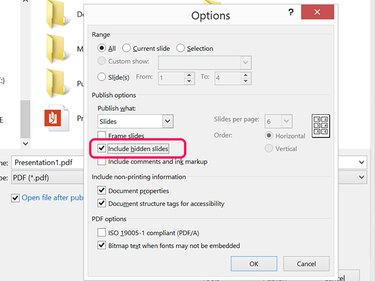
If you're exporting the presentation as a PDF or XPS document, hidden slides won't be included at the default settings. You may choose to export the file before hiding the appendix or simply make the hidden slides visible during the export process.
Step 1
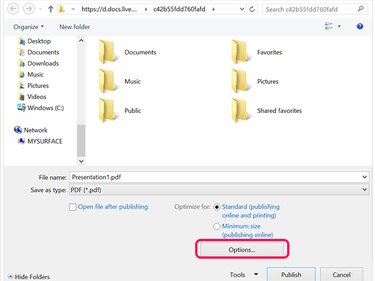
Click the File menu and select Export. and then click the Create PDF/XPS Document. Click the Options button.
Step 2
Click the Include Hidden Slides check box. Click OK.
