To create a circled information icon -- ⓘ -- in a Word document, use the Webdings font to either type the icon or insert it as a symbol. Depending on the fonts installed on your system, you may also be able to create the circled i and other information symbols with Unicode symbol shortcuts. Alternatively, search online to find an information icon image or create your own design.
Create a Webdings Information Icon
Video of the Day
Type the Icon
The Webdings font creates symbols when you type letters on your keyboard; it includes a circled information symbol.
Video of the Day
Step 1
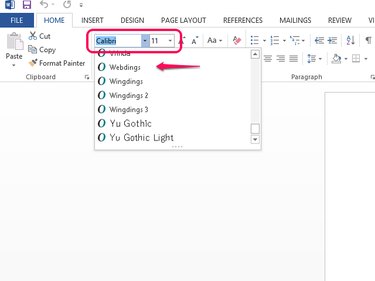
Open the Home tab and go to the Font area. Select the Font box arrow and scroll down to Webdings.
Step 2
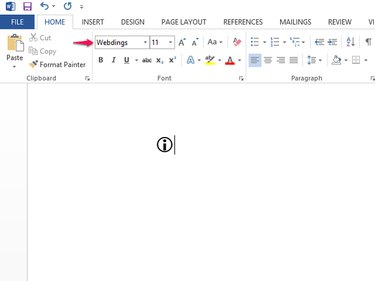
Select Webdings to set it as the current default. Type a lowercase i to insert a circled information sign.
Insert the Icon as a Symbol
Step 1
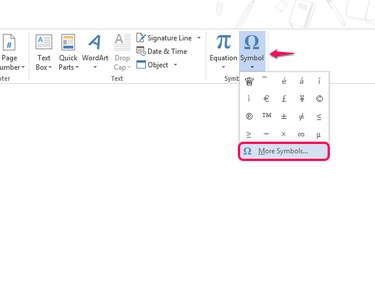
Open the Insert tab. Select the Symbol button and then More Symbols.
Step 2
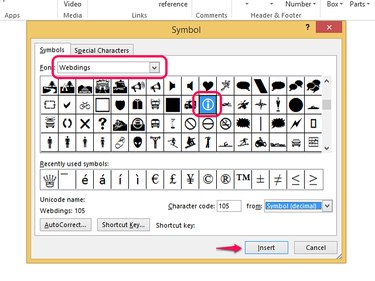
Change the font to Webdings. Scroll through the list of symbols until you reach the information icon and select it. Select Insert to add the symbol to the document and select Close.
Use a Unicode Symbol Shortcut
Unicode keyboard shortcuts insert symbols in a document, using a code and an Alt-X command. To insert the symbol, type its code and then press the Alt and X keys on your keyboard simultaneously. The Alt-X command then converts the code to a symbol. For example:
- ⓘ = 24d8 + Alt-X
- i = 2139 + Alt-X
- 💁 = 1F481 + Alt-X
Find an Information Icon Online
Step 1
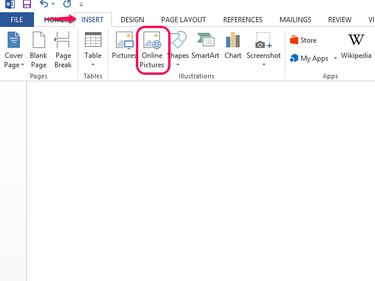
Open the Insert tab and select the Online Pictures button.
Step 2
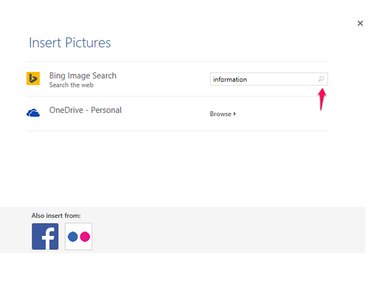
Type information in the search bar and select the magnifying glass icon to start the search.
Step 3
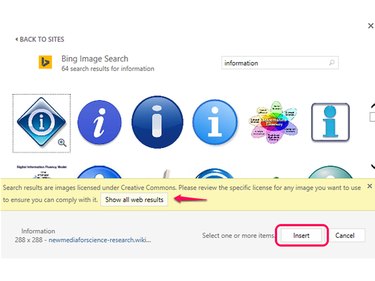
Scroll through the images in the list. If you find one you like, select it and use the Insert button to add it to the document. To see more online images, select Show All Web Results.
Create Your Own Information Icon
To make your own information icon, use Word's shape tools to add a circle around a letter and customize its design.
Step 1
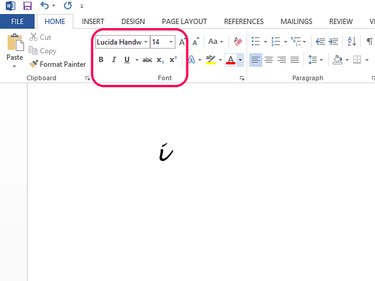
Type an i in the document and format it using the tools in the Font area of the Home tab.
Step 2
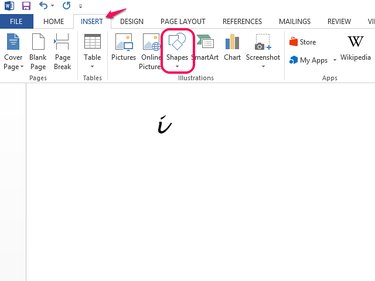
Open the Insert tab and select Shapes.
Step 3
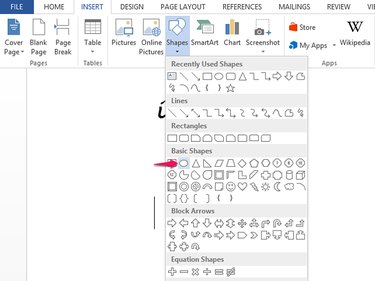
Select the oval shape in the Basic Shapes area. Hold down the Shift key to ensure that the oval inserts as a circle and drag your mouse around the letter to draw a circle around it. Don't worry about the shape covering the letter at this stage; you'll fix this later.
Step 4
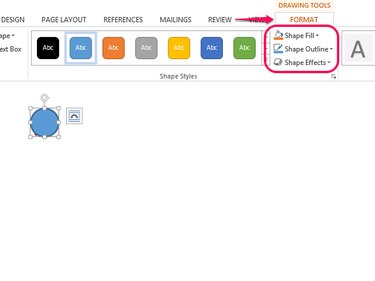
To customize the circle, select it and open the Format tab. Use the Shape Fill button to change the inner color of the circle; select No Fill if you don't want to use a color fill. Use the Shape Outline button to change the circle's outline color and Shape Effects to add special effects to the circle such as shadow and glow.
Step 5
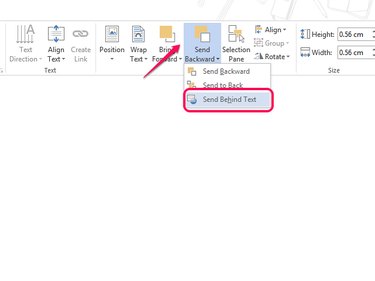
Select the circle and open Send Backward in the Arrange area of the Format tab. Select Send Behind Text. The letter will now show on the circle.