
With a bit of creativity, you can make almost any shape you need using the Shape tools available in PowerPoint 2013, including spirals. You can also do circle shape and draw inductor in Powerpoint. The spiral PowerPoint process involves combining shapes – in this case, arcs – to get a perfect spiral.
To get started, open a blank PowerPoint presentation or add a new blank slide to a presentation you've already started. Delete the empty text boxes -- they'll just be in the way for this project.
Video of the Day
Video of the Day
Start With an Arc
Step 1: Create the Arc
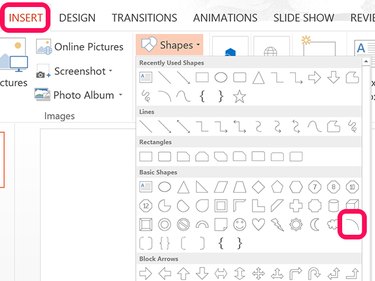
Click the Insert menu, select Shapes and then click the Arc icon.
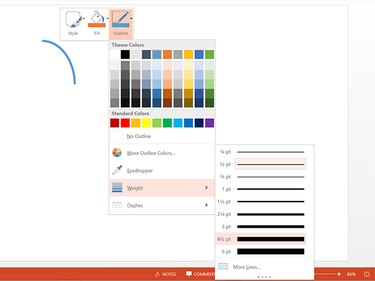
Drag the cursor across the screen to draw an arc. At this point, it doesn't matter how big it is. Right-click the arc and click the Outline icon so you can select a color and line weight from the drop-down menu.
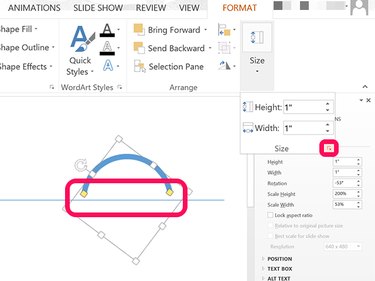
Select the Line icon from the Shapes drop-down menu. Draw a horizontal line below the arc by holding down the Shift key while dragging the cursor. Select the Arc and drag the Yellow Handles onto the line.
Click the Shape Tools' Format menu, select Size and then click the Expand Arrow at the bottom of the drop menu.
Step 2: Make the Arc a Semi-Circle
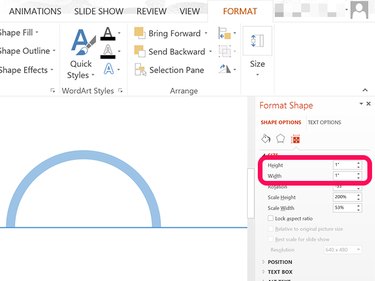
Change the arc's Height and Width to 1 inch to make the arc a perfect semicircle. Readjust the arc if needed so that its ends are exactly on the horizontal line. Note that you can use any size you want. For a smaller spiral, set the Height and Width to 0.5 inches.
Create the Spiral
Step 1: Copy the Arc
Create a copy of the arc by pressing Ctrl-C and Ctrl-V. Using the Size menu on the right, double the Height and Width of the copy. In our example, this is 2 inches each. Drag the copy so that it's centered on the original arc, with its ends touching the horizontal line.
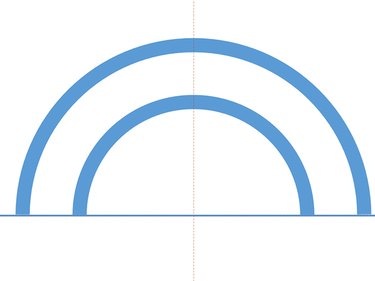
Press Ctrl-V again to create another arc and increase its Height and Width to 3 inches. Make a fourth copy that's 4-inches high and wide.
Step 2: Position and Group the Arcs
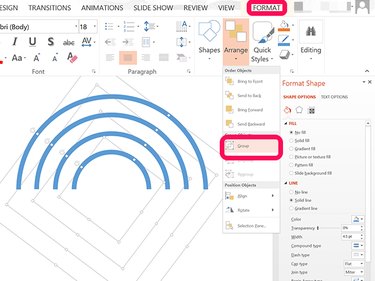
Position all the arcs so that they are centered on the original arc and touching the horizontal line. If you want to create a longer spiral than the one in this example, add two new arcs for each additional loop desired.
Delete the horizontal line and press Ctrl-A to select all of the arcs. Group them together by clicking the Shape Tools' Format menu, selecting Arrange and then Group.
Step 3: Copy the Grouped Arcs
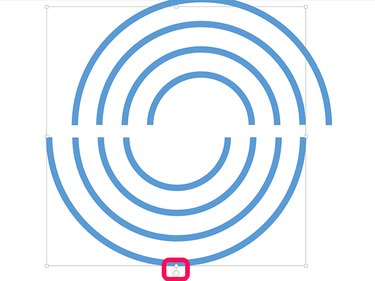
Create a copy of the grouped arcs by pressing Ctrl-C and Ctrl-V. Rotate the copied group 180 degrees by dragging the circular Rotate Handle while holding down the Shift key. Drag the copies one-inch to the left and then adjust the position so that the edges of the top and bottom arcs touch seamlessly.
Step 4: Finish the Spiral
At this point, you have an interwoven double-spiral, so we need to delete four of the arcs. The easiest way to do this is to click the outer spiral at 10 o'clock and then Ctrl-click every other arc across the shape diagonally.
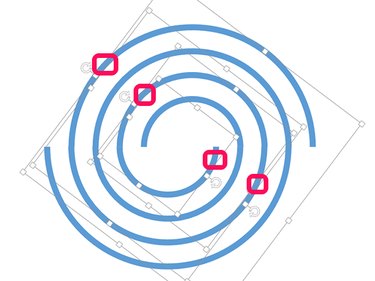
Delete the arcs by pressing the Delete key. If you happen to need two spirals, drag them to the side. If you accidentally delete the wrong arcs, press Ctrl-Z a couple of times and try selecting them again.
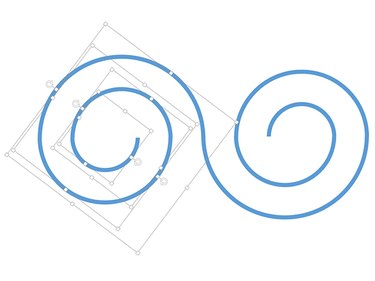
Copy and paste the completed spiral into any PowerPoint presentation.