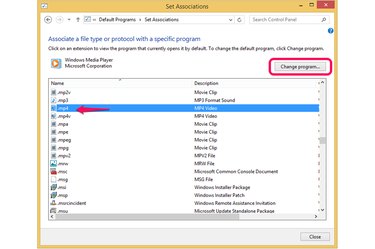
Use the Set Associations dialog box in the Control Panel to associate a file's extension with a specific app so that the file opens automatically in the app you choose. Alternatively, select a program to open certain types of files by default using the Set Default Programs window. Both methods give the same result: your files open by default in the app of your choosing.
Using the Set Associations Window
Video of the Day
Step 1
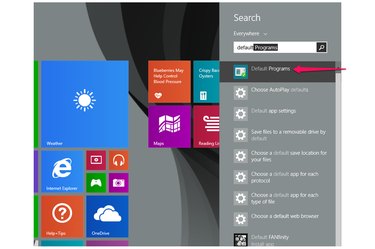
Search for "default programs" and select it from the search results to launch the Default Programs dialog box.
Video of the Day
Step 2
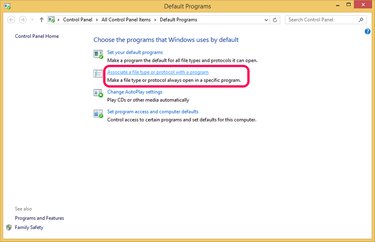
Click the "Associate a file type or protocol with a program" link to open the Set Associations window.
Step 3
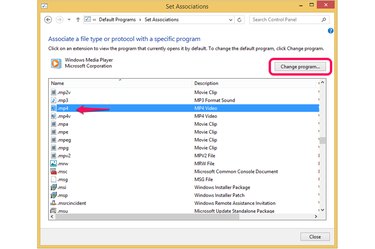
Scroll down and select the file type extension that you want to associate with a specific app -- for example, MP4 -- and then click the "Change program..." button. Alternatively, just double-click the extension. Both actions open the same dialog box for setting a file association.
Step 4
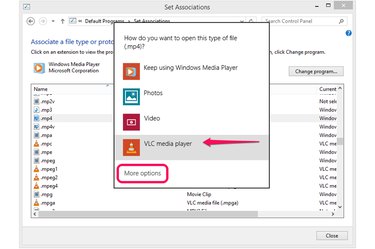
Choose the program to associate with the file type at the "How do you want to open this type of file?" prompt -- for example, "VLC media player" for an MP4 file. If you have several apps that are capable of opening this file type, you may need to scroll down to find the one you want. When you select the app, Windows takes a moment to make the association. If the app you want is not displayed, click on "More options" to view additional apps, and then make your selection.
Step 5
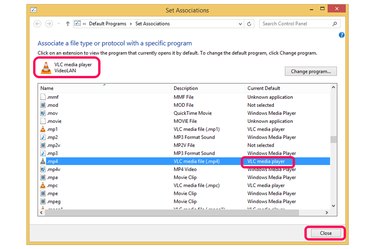
View the new association in the Set Associations dialog box. Click "Close" and then exit the Control Panel.
Using the Set Default Programs Dialog Box
Step 1
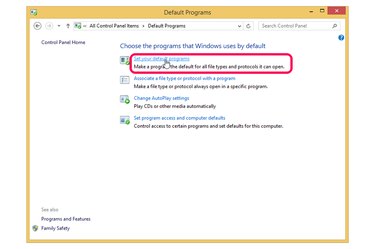
Open the Default Programs dialog box by searching for "default programs" and selecting it from the search results. Click the "Set your default programs" link to open the Set Default Programs dialog box.
Step 2
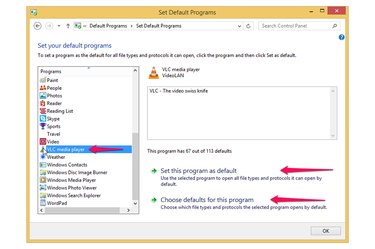
Choose the program from the list on the left to select which files it should open. With an app selected, the dialog box displays the number of file types already set to open with this program -- for example, "VLC media player" is already the default program for 67 out of a possible 113 file types it is capable of opening. To use this program to open all possible file types, click "Set this program as default." Alternatively, select "Choose defaults for this program" if you want to fine tune which file types this program can open. This selection launches the Set Program Associations dialog box.
Step 3
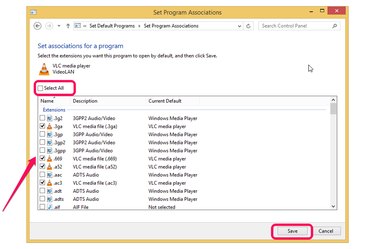
Choose the file types that you want to open using this program. Check "Select All" if you want all file types. Click "Save" when you have completed your selections, and then click "OK" to close the Set Default Programs dialog box.