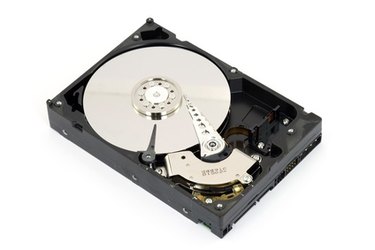
Disk drives have always acted as a bottleneck in many computing tasks, and as most components inside computers have grown even faster in comparison, this is truer than ever. When launching a program, loading a level in a game, copying music or more, the time you spend waiting is most likely because of your disk drive. For that reason, speeding up your disk drive can make your computer feel much more responsive and reduce the time you spend waiting.
Improving Transfer Rates
Video of the Day
Step 1
Turn off disk compression.
Video of the Day
Open the "Start" menu and click "My Computer" for Windows XP or "Computer" for Windows Vista and 7. Right-click the drive you want to improve and click "Properties" to bring up the disk properties window. On the "General" tab, uncheck "Compress this drive to save disk space."
Step 2
Defragment your hard drive.
In the disk properties window in Microsoft Windows XP, click on the "Tools" tab, click "Defragment Now," then click "Defragment."
Generally, defragmenting should only be necessary every few months at most. Also, Windows Vista and Windows 7 automatically defragment your hard drive by default. Defragmenting should never be done with a solid state drive.
Step 3
Enable write caching.
In the disk properties window, click the "Hardware" tab, select the disk to be improved, then click "Properties." In the new window, if there is a button labeled "Change settings," click it. After you have clicked it, or if it was not there, find the "Policies" tab and select it.
If there is an option box labeled "Optimize for performance," select it. In some cases, this option may be grayed out or may not exist. In either case, check the box that begins with "Enable write caching...."
If there is a check box labeled either "Enable Advanced Performance" or "Turn off Windows write-cache buffer flushing on the device," you may choose to enable it as well for an additional performance boost. This may result in data corruption if your computer suddenly loses power, however, so consider only using this option if you have battery backup such as on a laptop.
Solid State Drives (SSD) Only
Step 1
Use an operating system with TRIM support.
An SSD's performance can degrade after extended use. Wiping the SSD with special tools can restore its performance to normal, but this requires losing all your data. The TRIM feature available in most SSDs can remedy this problem and maintain performance over a long period of use.
As of 2010, only Windows 7 and Linux support TRIM.
Step 2
Leave 20-percent free space available.
According to AnandTech, some SSD controllers take advantage of free space on the drive in order to optimize performance. If you leave at least 20 percent of the drive free, most SSDs will operate at peak efficiency.
Step 3
Disable automatic defragmenting.
SSDs work differently from conventional hard drives and do not need to be defragmented. Automatic defragmenting on an SSD wears down the drive and uses disk bandwidth that you may need for yourself.
In Windows Vista, open the "Start" menu and click "Computer." Right-click on your SSD, then click "Properties." Select the "Tools" tab and click "Defragment now." In the "Disk Defragmenter" window, uncheck "Run on a schedule," then click "Okay."
Windows 7 automatically disables disk defragmenting for SSDs, and Windows XP does not automatically defragment disk drives.
- My Digital Life: Improve SATA (Serial-ATA) Hard Disk Drive Speed Performance in Vista
- The PC Guide: Hard Disk Performance Optimization
- Microsoft Support: How to Defragment Your Disk Drive Volumes in Windows XP
- AnandTech: The SSD Improv: Intel & Indilinx get TRIM, Kingston Brings Intel Down to $115
- Linux Kernal Newbies: Linux 2 6 33