Tables in Word 2013 look similar to cells in an Excel spreadsheet, but unlike Excel, you can't start a formula simply by typing an equals sign. Word's formulas can also use a different notation, referring to sets of numbers by their relative position. To add table cells using the SUM function, insert a formula from the Layout tab.
Sum Cells in a Table
Video of the Day
Step 1: Start a Formula
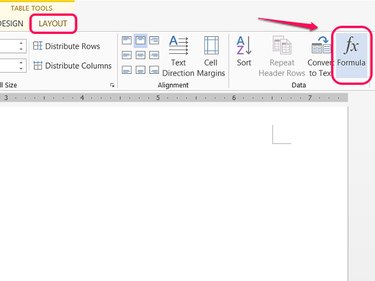
Click the target cell in your table, open the Layout tab and click Formula in the Data section.
Video of the Day
Step 2: Sum an Entire Direction
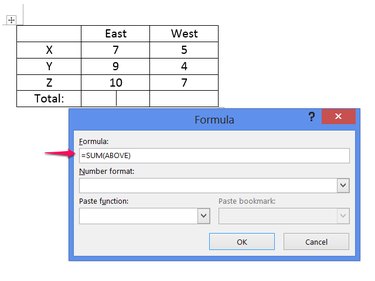
Write a formula using the function =SUM to add cells. When you first open the formula window, Word defaults to the formula =SUM(ABOVE). If you want to add all cells above the selected cell, you don't need to change anything. To add cells from a different direction, change the formula to =SUM(BELOW), =SUM(LEFT) or =SUM(RIGHT).
Step 3: Change the Number Format
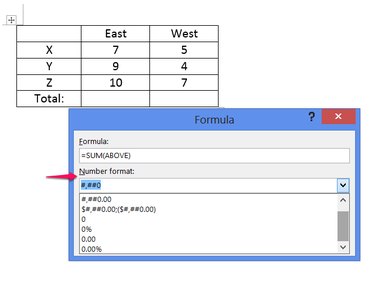
Choose a number format, if needed. Without a number format selected, the formula's result appears without any formatting, akin to Excel's "General" formatting. Most of the time, you don't need to use a format. Word also lets you write your own format using the same system as in Excel. Click OK to finish the formula.
Step 4: Sum Specific Cells
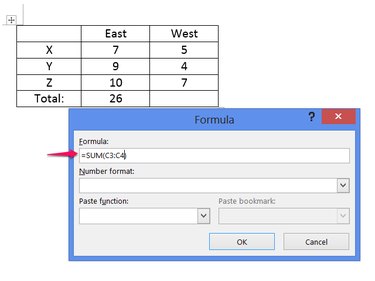
Refer to cell locations in a SUM function to add specific cells rather than an entire direction. Even though Word doesn't display row and column headings like Excel, it uses the same terminology: rows use numbers and columns use letters. For example, to add the cell three to the right, three down, and the cell below it, use the formula =SUM(C3:C4).
Insert an Excel Spreadsheet
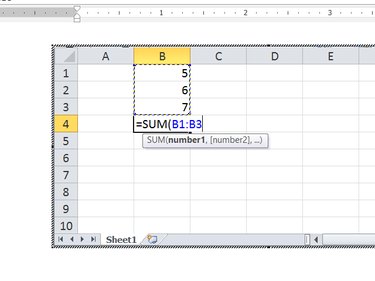
Another way to add cells in a Word document is to insert an Excel spreadsheet. Click Table on the Insert tab, as if inserting a table, but instead of choosing a table size, click Excel Spreadsheet. Inserted spreadsheets work exactly like spreadsheets in Excel, allowing you to simply type the function =SUM in the desired cell.