Pedigree charts display information in a hierarchy, and are often used to show relationships, such as in genealogy trees and organization charts. You can create a pedigree chart in Microsoft Word using Microsoft Office SmartArt.
Step 1: Insert SmartArt Graphic
Place your cursor in your document where you want the pedigree chart to be added.
Video of the Day
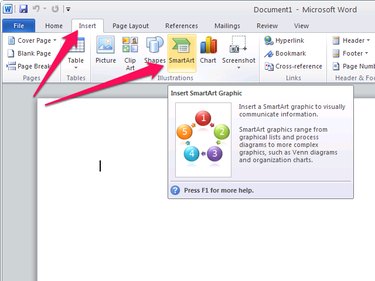
Select the Insert tab in the Office Ribbon and click the SmartArt icon in the Illustrations section of the Ribbon.
Step 2: Choose a Hierarchy Graphic
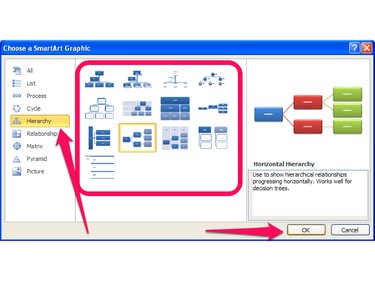
Click the Hierarchy category, select the type of hierarchy chart you want from the list and press the OK button.
Step 3: Edit the Text of Each Item
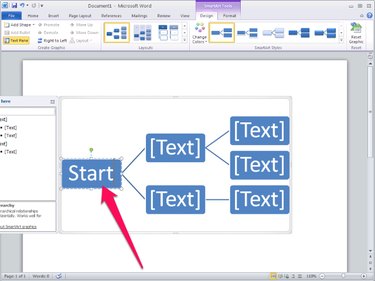
Left-click on each shape to select the text in the shape, then type to enter or change the text.
Step 4: Format the Chart
To format the chart you may change the formatting of the entire chart at once or change the format of each shape individually.
Formatting the Entire Chart
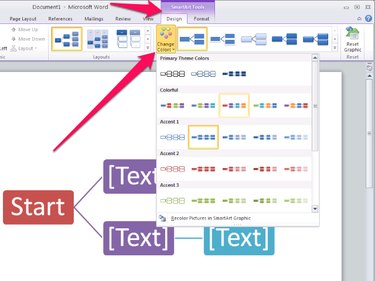
Select the Design tab in the SmartArt Tools area of the Office Ribbon, and select the format change you wish to make in the SmartArt Styles section of the ribbon.
Video of the Day
Formatting Individual Shapes
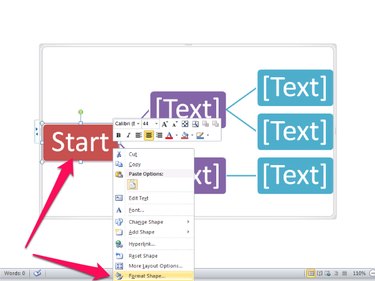
Right-click the individual shape you want to change and select Format Shape... in the right-click menu.
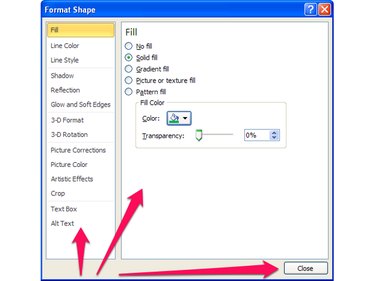
Select the formatting category you wish to change in the left pane and change the formatting options in the right pane. When you've finished making changes press the Close button.
Adding Shapes
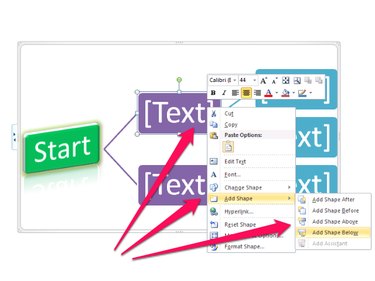
Right-click a shape in the pedigree chart, click Add Shape in the right-click menu and select an option from the Add Shape sub-menu.
Changing Shapes
When you create a new pedigree chart, the shapes in the chart will usually be some form of rectangles. You may change the shapes to circles, ovals or any other shape type supported by Word.
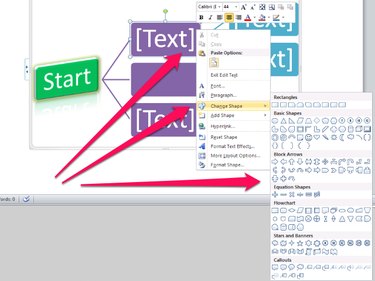
Right-click the shape you want to change, click Change Shape in the right-click menu, and select the new shape from the Change Shape submenu.
