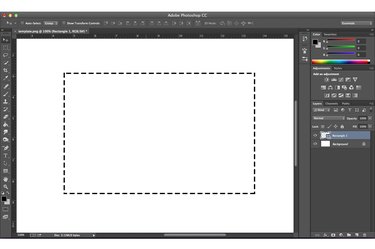
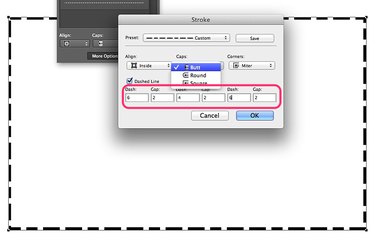
A rectangle with a dashed border is a great way to draw a reader's attention to something important, like text or a cut-out coupon. A dashed stroke is one of the border options for rectangles and other shapes in Adobe Photoshop CC. To create this effect, first draw the rectangle, then stylize the dashed outline as you want it to appear.
Step 1
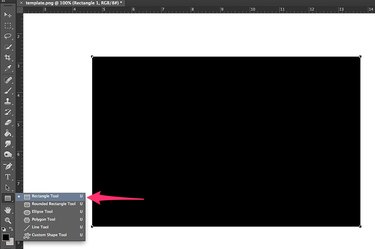
Click the "Rectangle Tool" in the Photoshop Toolbox. Drag the cursor over the canvas to draw a rectangle. Hold down the "Shift" key while dragging if you want to draw a square. The rectangle appears as a new layer on the canvas.
Video of the Day
Step 2
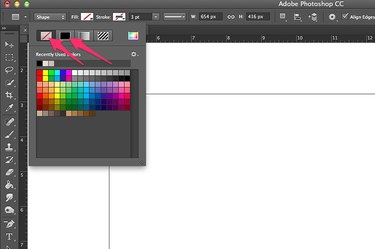
Click the "Fill" button in the Options bar and select "None," the icon with a diagonal line through it. Click the "Stroke" button and select any color you want for the border. Change the thickness of the border using the "Shape Stroke Width" option next to the Stroke button.
Step 3
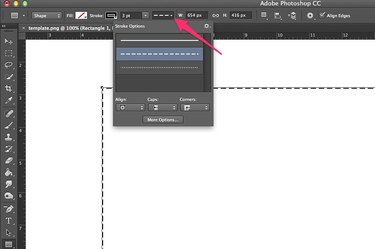
Click the "Stroke Options" button and select the "Dashed" line. You can also select your preferences for the border's alignment, the caps on the end of each dash and the corner style using the menu options in this window.
Step 4
Click the "More Options" button. The same three style menus appear in this window as the Stroke Options menu, however each style has a description. From the Caps menu, you can select from square, round or butt ends for each dash. From the Align menu, specify if you want the dashes to appear inside, outside or centered on the rectangle's border. From the Corners menu, select miter, round or bevel corners. If you want irregular size dashes or spaces, you can specify the sizes in the text fields in this window, as well.
Video of the Day
