In Photoshop CC, there a few different ways of making outlines using a stroke (which is basically a border or frame). These include creating ovals and rectangles using Marquee Tools, making free-form outlines using the Pen Tools, or even creating an outline from the details of a photo using a Color Range selection. If you are looking for information about creating an outline from text, we have a dedicated tutorial here.
Outlines From Selections
Video of the Day
In Photoshop CC, you can create an outline using any of the selection tools, including the Lasso and Marquee Tools. For example, if you draw a circle with the Elliptical Marquee Tool, you can convert it to a stroke by selecting Stroke from the Edit menu.
Video of the Day
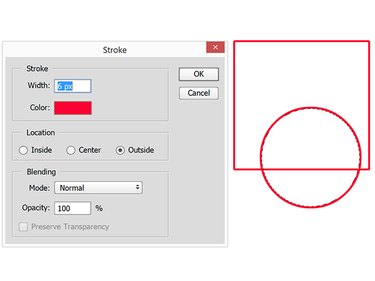
The Stroke window includes options to change the stroke width, the stroke color and whether the stroke should be applied inside, outside or along the center of the selection lines. You also have options to change the blending mode and opacity before clicking OK.
Outline Strokes With the Pen Tools
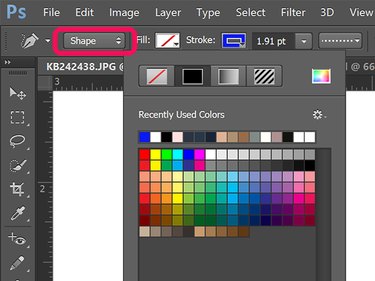
A second way to make outline strokes on a canvas is by using the Pen Tool or the Freeform Pen Tool in the Toolbox. After selecting the tool, select Shape in the Options bar. Select No Fill from the Fill menu and then change the Stroke Color and Stroke Width as needed.
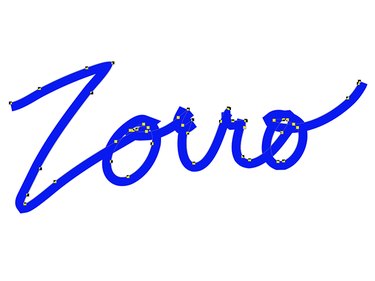
When you create lines with the tool, the stroke you specified appears immediately on the canvas. Note that you can change the options as long as the stroke is selected.
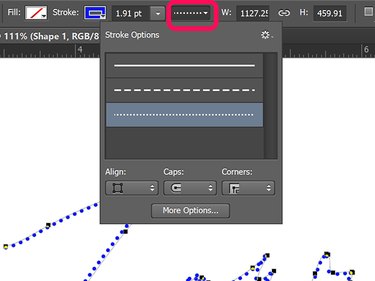
To use dotted or dashed lines instead of solid lines, click the Shape Stroke Type menu in the Options bar. The options at the bottom of this menu allow you to change how the stroke is aligned to the Pen's path, the caps and the corners of the lines.
Advanced Outlining Effects
When working with photographs, strokes can be a quick way to darken and thicken lines and to enhance details. Tracing a detail with the Freeform Pen Tool is one way to do this. However, if you want to enhance an entire photo, try using a Color Range selection, available under the Select menu.
In this example, we can use Color Range to select the dark lines in a photo, set with a high degree of Fuzziness.
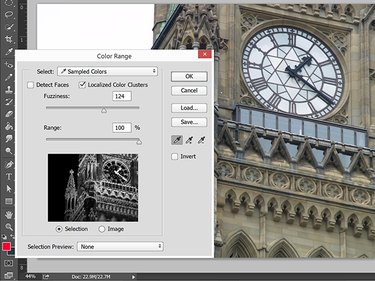
After the color range is selected, photo details that fall into that color range can be transformed to strokes using the Stroke option under the Edit menu. Before adding the stroke, click the New Layer button in the Layers panel so the stroke appears on its own layer without affecting the original photo.
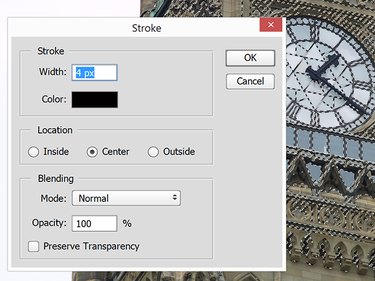
As you can see, the lines created by the stroke are much darker than the lines in the original photo alone. Notice how only the selection lines were stroked, not the fill area between any lines.

Hide the original photo by clicking the Eye icon beside the Background layer in the Layers panel. The result is a pretty good line drawing of the photo's details. The gray that appears comes from having partial pixels selected when the Color Range was selected. If the Color Range Fuzziness had been reduced, there would be less gray, or no gray at all.
