Rather than rushing out to the stationary store, create your own customized invitations for any upcoming event using Microsoft Word 2013 and your home printer. For formal events, consider using a high-quality, thick paper or card stock. Regular typing paper usually feels a bit flimsy when it's used as an invitation.
Step 1: Set the Page Size and Margins
Open a new, blank Word document. Click the Page Layout tab, then the Size icon and then select More Page Sizes at the bottom of the drop-down menu.
Video of the Day
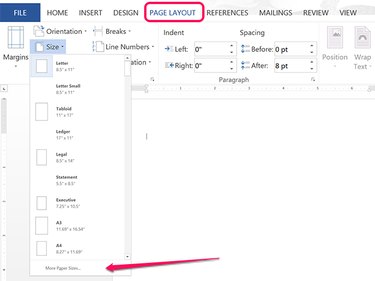
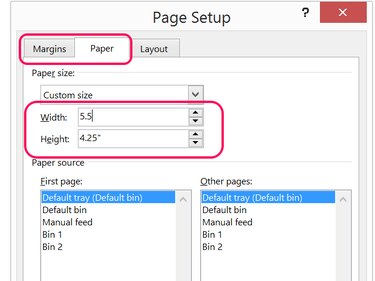
Specify the Width and Height for the invitations in inches so they will fit your envelopes. Remember to make them a bit smaller than the envelope so they'll fit inside. In our example, we're using a Width of 5.5 inches and a height of 4.25 inches, which can be printed in batches of four on standard letter-sized card stock.
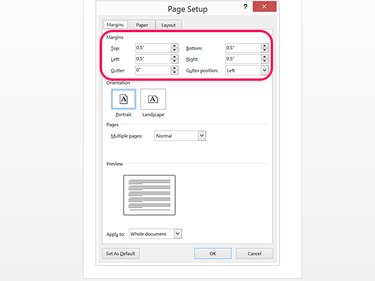
Click the Margins tab in the Page Setup window and specify a margin size. A 0.5-inch margin around all four sides should be good for most home printers. Keep the Gutter setting at zero.
Step 2: Add the Text
Type the text in whatever way makes the most sense for your invitation. If you're not using text effects, you can just enter the words as you would type a letter.. If you want to apply effects to the text, use Text Boxes or Word Art instead. In our example, we're using Word Art for the title so we can add a reflection effects to it.
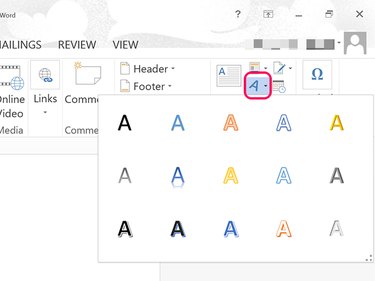
To insert a Text Box, click the Insert tab and click the Text Box icon. To insert Word Art, click the smaller Word Art icon. Select a style and then drag the cursor from the left edge to the right edge of the page.
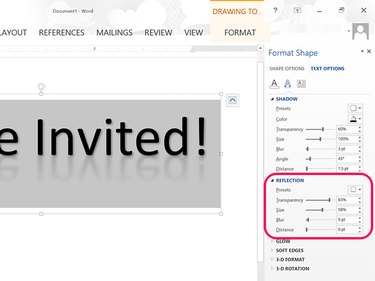
To add effects to a Text Box or Word Art box, click the Drawing Tools Format tab while the box is selected and click the small Arrow beside Word Art Styles. Expand the menu options that appear on the right to add effects like a Shadow, Reflection. or Glow.
Highlight the text and click the Home tab to change font, font size and alignment. Select fonts that go well with the event. The Broadway font, for example, goes well with an entertainment event, but wouldn't work well for a typical wedding invitation.
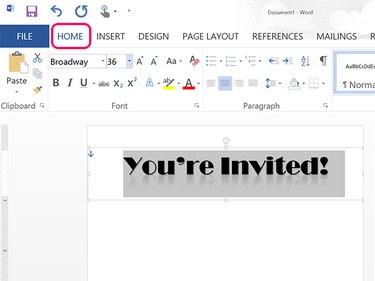
Word doesn't automatically correct for margins for text boxes, so you'll have to make sure that the letters don't exceed the margins by resizing the right and left sides of the box.
Step 3: Add a Border
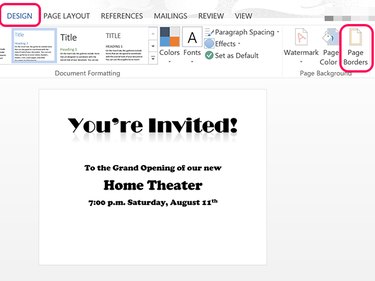
Click the Design tab and select the Page Borders icon. A page border isn't always necessary, but it can enhance the overall design.
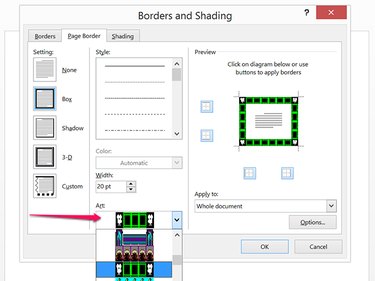
Select a border style that suits the nature of the event. A thin line works well for formal invitations. For a fun event, like a child's birthday party, try using one of Word's many Art border options. In our example, we're using a movie border to tie into a home theater opening.
Step 4: Add Lines or Images
Select the Insert menu to insert lines, shapes or images to the invitation. To add a line beneath a key phrase, for example, select the Line option from the Shapes icon. Holding down the shift key while you drag the cursor will keep the line perfectly horizontal or vertical.
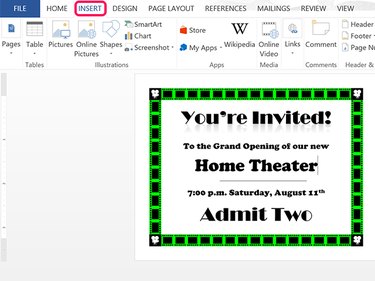
For a birthday party invitation, a picture of the birthday boy or girl from your computer, or online pictures of balloons or cake can work well. Small pictures can be inserted within the text, or used as a background image. To change the appearance of a line, shape or image, click the Picture Tools Format tab.
Step 5: Print the Invitations
Before printing the invitation, proof read it. Make sure all of the details are listed, including:
- the event name or description.
- the date and time.
- RSVP, if needed to plan the event.
- the event address, if it's not obvious.
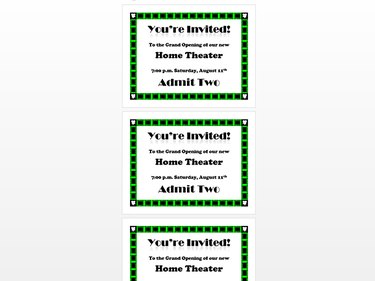
To print more than one invitation on a single page, create as many copies as you need for each page. To do this quickly, press Ctrl-A and Ctrl-C to select everything on the page. Place the cursor at the bottom of the page and press Ctrl-V to paste as many copies as you need.
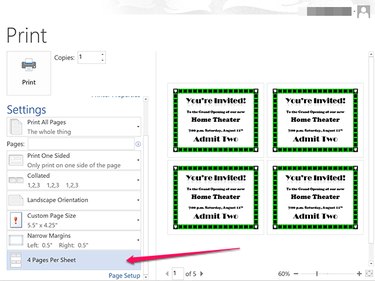
Click the File tab and click Print. To print four copies on each page, click the 4 Pages Per Sheet option under the Pages section. Select the number of Copies you need and click the Print button.
Video of the Day