You can unlock your Wi-Fi connection by disabling wireless security in your router settings. This allows you to connect to your Wi-Fi network without a password.
Step 1: Access Administration Interface

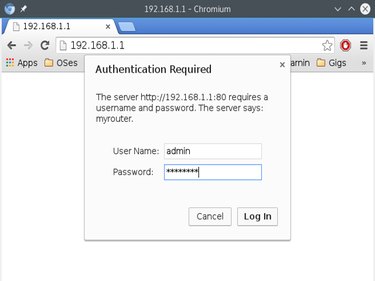
Open a Web browser. Enter the IP address of the router into the address bar to access the admin interface. The local IP address for the router is usually 10.0.0.1, 192.168.1.1 or 192.168.0.1. It is the same address as the default gateway.
Video of the Day
Enter the admin username and password when prompted. The default credentials are usually written on the back or bottom of the router. The most common username is "admin" and the most common default password is "password." You can also find the default admin username and password for your router by searching the manufacturer's support site or checking the router's user manual.
Step 2: Navigate to Wireless Security Settings

The wireless security settings can usually be found in the Wireless Setup or Basic Setup section of the admin interface. On some routers, there may be a separate page dedicated to wireless security.
On Netgear, select the Basic tab from the menu at the top of the screen and then select Wireless Setup from the menu on the left. The wireless security settings are located the Security section.
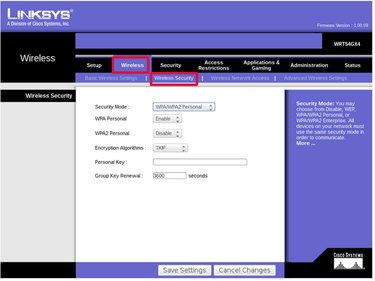
On Linksys routers, select the Wireless tab from the menu at the top of the screen. Underneath that, select Wireless Security.
Step 3: Set Security Type to Open

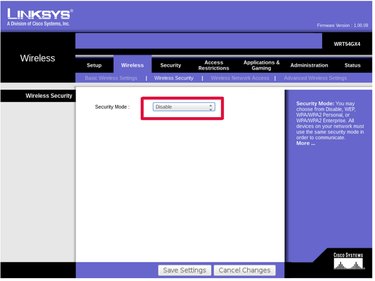
There will be an option to select a security mode or security type. Select Open, Unsecured or Disable Security to use the router without a password.
On Netgear routers, select the radio button for None under the Security heading.
On Linksys routers, select Disable from the security mode drop-down menu.
Step 4: Save Settings

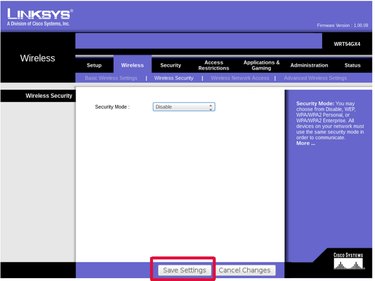
Click Save or Apply to make the changes take effect. The router is no longer secured and can be used without a password.
Video of the Day