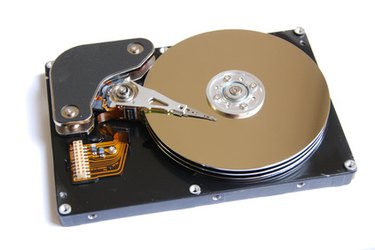
Partitioning a disk allows multiple operating systems to access the disk. The disk is split with one operating system taking a chunk of the memory and the other taking another chunk. There is not a fixed limit to the number of partitions that can be cut out of the same hard disk. However, there are instances when an operating system will overstep its bounds. This is generally the result of a coding error within the operating system which misinterprets the status of the partition. There is, however, free software available to aid a novice computer user in troubleshooting partition issues.
Repair bad disk partitions with Easeus free software
Video of the Day
Step 1
Download the Easeus free software. Click "Download Now." A download dialog box will pop up. Click "Save File."
Video of the Day
Step 2
Install the free software. Double click the file name "partition_recovery.exe" to start the install wizard. Follow the instructions on your screen.
Step 3
Start the free software. Either double click the icon on your desktop or click "Start," "Program Files," "EASUES Partition Recovery 5.0.1," "EASUES Partition Recovery 5.0.1"
Step 4
Run the recovery wizard. EASUES Partition Recovery will load a wizard which will guide you through the process of recovering your partition. It will allow you to preview the newly recovered partition before completing the process. This gives you the chance to stop the process without making any changes to your computer.
Step 5
Restart your computer. Upon restart the partitions will be in place as you set them during partition recovery.
Repair bad disk partitions with Active@ Partition Recovery free trial
Step 1
Download the Active@ Partition Recovery free trial software. A download dialog box will pop up. Click "Save File."
Step 2
Unzip the software folder. Right click the file and select "Open Containing Folder." Right click "recovery.zip" and select "Extract here."
Step 3
Create partition recovery boot disk. Insert a USB jump drive into a USB port on the computer. Double click "partitionrecoverybootsetup.exe" Select the drive from the drop-down menu. Click "Start."
Step 4
Enter the computer BIOS. Restart the computer. A prompt will appear on the bottom of the screen with a message indicating which key to press to enter setup. For most modern systems this key will be F1, F2, F10, ESC, or DEL. Press that key. The blue BIOS screen will appear. Use the arrow keys to navigate to "Drive" (in some cases "Boot Drive") Follow the instructions on the screen to set the USB Flash Drive to the primary boot drive. Follow the instructions on the screen to save and exit BIOS.
Step 5
Run Active@ Partition Recovery. Your system will boot from the USB drive. Follow the step-by-step partition wizard to repair problematic partitions.
Step 6
Reset BIOS. Restart your system. Enter the BIOS. Follow the instructions on the screen to "Restore Factory Settings" then save and quit. Your system will boot normally with properly formatted partitions.
Repair bad disk partitions with Acronis Disk Director free trial
Step 1
Download the Active@ Partition Recovery free trial software. A download dialog box will pop up. Click "Save File."
Step 2
Install the free software. Double click the file name "ADD11H_trial_en-US.exe" to start the install wizard. Click "Install Acronis Disk Director." Follow the instructions on the screen.
Step 3
Run Acronis Disk Director. Click "Start," "Programs," "Acronis," "Disk Director," Acronis Disk Director Suite." Select "Automatic Mode."
Step 4
Repair the partitions. Follow the instructions on the screen.
Step 5
Reboot your system.