If you run into a serious PC problem, System Restore remains the best and easiest way to return your computer to an earlier, happier time. It protects your personal files even as it eliminates the recently changed registries, drivers and software that might be causing you computer heartache.
Using System Restore
Video of the Day
Assuming you've turned on System Restore in Windows 10 (and we'll discuss how to do that below), here are the steps to take to restore your settings to an earlier date.
Video of the Day
STEP 1
Click on the windows tab in the task bar and type 'recovery' in the Windows 10 search field. Select Recovery Control Panel.

STEP 2
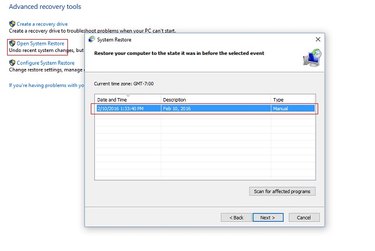
Select Open System Restore. You'll see the dates and times of your various system restores. In this example image, there is only one restore point but typically there will be more. Select the one you want that you think was created before your PC problems started. Click Next.
STEP 3
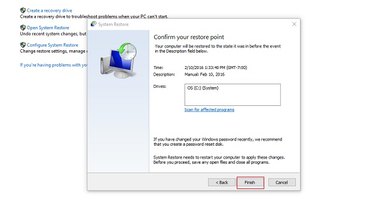
Click Finish to confirm your restore point selection. The system will restore your PC to its last restore point.
Restore from Safe Mode
You know that scene in every horror flick when the teenagers are struggling to close the door as the monster closes in, but there's one teen who doesn't make it? Likewise, there might be times when you can't successfully start System Restore because of some major issue with Windows. Fortunately, you can still run System Restore by running Windows Safe Mode.
STEP 1
Select Settings from the Start Up menu.

STEP 2
When the Settings dialog box open, select Update & Security.

STEP 3
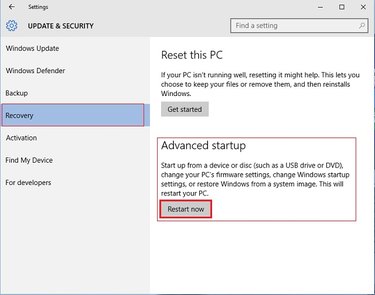
Select Recovery. Next, Click Restart Now under Advanced startup.
STEP 4
Select Troubleshoot when the following screen appears on restart.

STEP 5
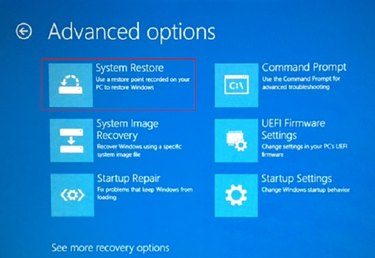
Select Advanced Options. You're almost there!

STEP 6
Select System Restore. The system will restore through safe mode.
How to Turn on System Restore
As we mentioned at the beginning, Windows 10 requires you to activate System Restore. Here are the steps to starting System Restore so that you won't be faced with the unpleasant surprise of having no restore points when you need them most.
STEP 1
Type System Restore into the Windows 10 search field. Then select Create a restore point.

STEP 2
When the System Properties dialog box comes up, select Configure.
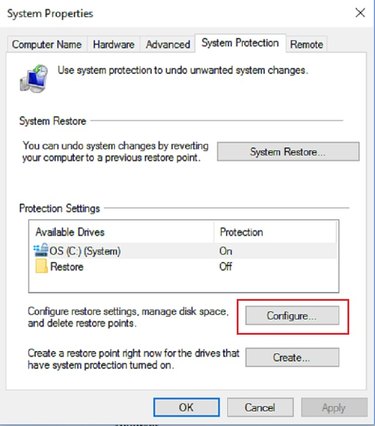
STEP 3
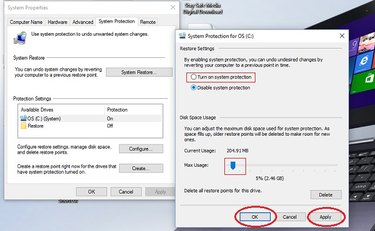
The System Protection box will appear. You can see that the default position for System Restore is disabled. Select the radio button next to Turn on system protection. You will also see a slider. Move the pointer along that slider to 5%. Then select Apply and OK.
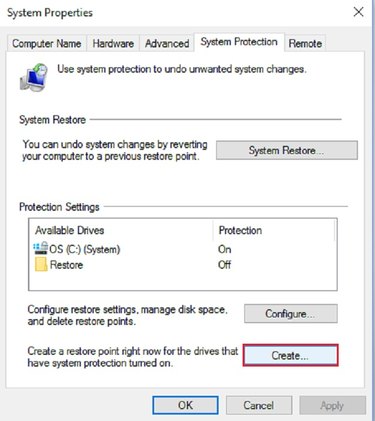
STEP 4
Once you click OK, you will be returned to the System Properties box. Now is your chance to create your very first restore point. Click Create.
STEP 5
In the Create a restore point dialog box, give your restore point a name.
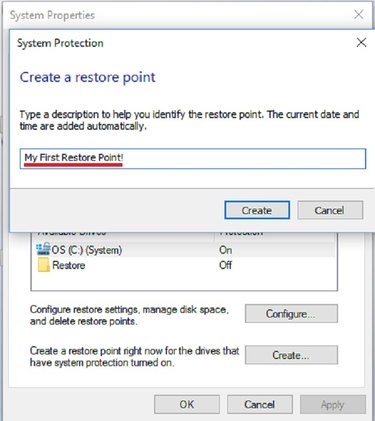
STEP 6
Restore points will now be created whenever a significant change is made to your system.
