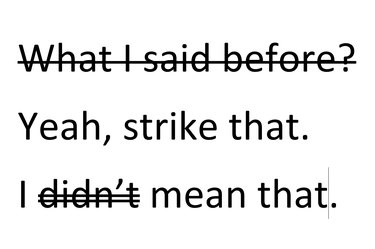
Strikethrough text is a useful tool for editors and anyone collaborating on a document. Also known as a strikeout, the line through the text tells the reader that the text should be removed. In Microsoft Word 2013, you can use single or double line strikesthrough. The double strikethrough may be more readily visible by readers, but you can choose either one. If you want to a strikethrough to be a different color than the selected font, or if you want to apply a single continuous strikethrough line to several font styles and sizes, use Word's line shape to make your strikethrough.
Step 1
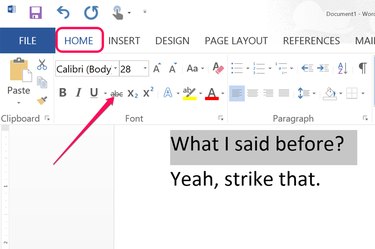
Highlight the text you want to strike. Click the "Home" menu and then click the "Strikethrough" icon in the Ribbon's Font section. Word immediately applies the strikethrough effect to the selected text.
Video of the Day
Step 2
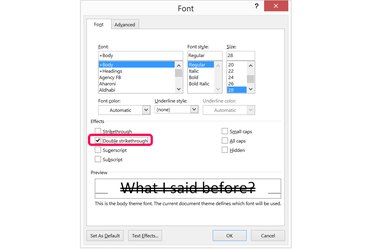
Apply a double strikethrough effect to the selected text using an option in Word's Font window. To open the Font window, click the "Home" menu and then click the small button in the bottom-right corner of the Font section in the Ribbon. Click the "Double Strikethrough" check box in the Font window and click "OK."
Step 3
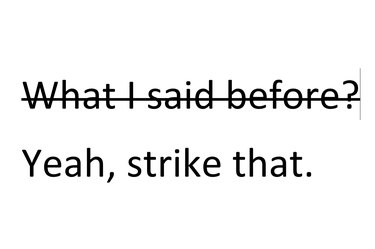
Apply any other changes to the text, like changing the font style, size or color. Keep in mind that the strikethrough effect varies with the font and font size. If you change the font size of one word, for example, the strikethrough will no longer be a straight seamless line.
Video of the Day
Creating Your Own Strikethrough
Step 1
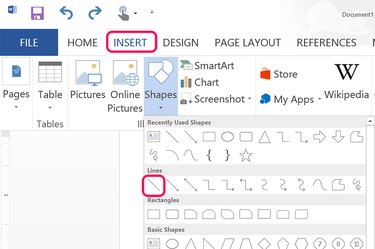
Locate the text that you want to strike out in Word. Click the "Insert" menu and select the "Shapes" icon. In the drop-down menu, click the first line in the Lines section.
Step 2
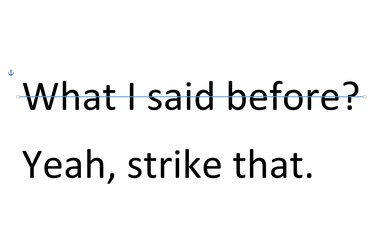
Move the cursor to the location you want the line to begin, ideally just in front of the first letter and half-way up from the bottom of the text line. Drag the mouse across the text while holding down the "Shift" key. This locks the line's angle so that it stays perfectly horizontal.
Step 3
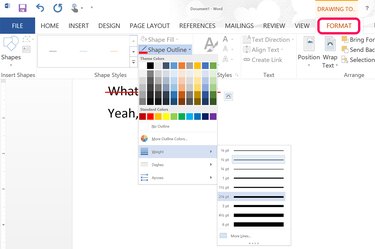
Click the Drawing Tools "Format" menu and select the "Shape Outline" icon. Select any color you wish for the line and click the "Weight" option to set the line thickness. As you hover the mouse over each line weight, the line changes its appearance on the page, so you can easily tell which one looks best without having to go back and try a different weight.
Step 4
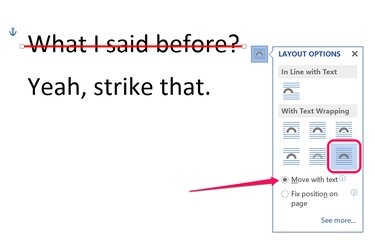
Click the "Layout Options" button that appears on the right side of the line. Select the "In Front of Text" icon if not already selected. Click the "Move With Text" radio button so that if you add or delete lines above the strikethrough, the line will stick to the text. Unfortunately, if you add or remove words in the same line as the strikethrough, the line won't stay with the text, so you'll have to drag the line to its new position manually.