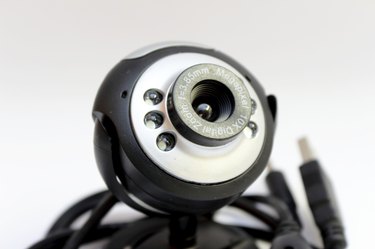
You can set up your own IP camera using an existing webcam with the proper software and network configuration. Unless you're broadcasting yourself on the Internet outside of a video conference, you're likely planning to use an IP camera for security or surveillance purposes. While using a webcam as an IP camera may not be as robust or practical as a closed-circuit security system, it lets you check in on the video feed from anywhere with an Internet connection.
Using Your Computer
Video of the Day
Your computer literally runs the show if you are using a webcam as an IP camera. The webcam's only functions are to record video and audio data: it's the computer that runs the program to interpret the data and broadcast it over the Internet. Whereas a dedicated IP camera is a self-sufficient unit, the computer/webcam combination can be a low-cost alternative for getting your feet wet in IP cameras. However, the computer needs to be powered on at all times for the webcam to work, so you may save energy costs by switching to a dedicated system.
Video of the Day
Select Your Software
A webcam is just a piece of hardware with no software. A typical video conferencing and instant messaging application can work to send a video feed to a single external location, but it's really not practical for long-term use. Programs like Digi-Watcher, Yawcam, IP Camera Adapter, DeskShare and iSpy are all designed for persistent IP camera streaming (see Resources). Each program works a bit differently, but works for streaming a connected webcam feed.
Configuring DNS And Routing
The IP camera feed is useful only if you can access it: you'll need to configure DNS forwarding and your router to make sure you can locate and access the feed. You can handle the DNS forwarding by setting up an account with a free DNS forwarding service, such as Webhop (see Resources). Once you've configured the DNS forwarding service, connect to your router's configuration utility through the computer and add the dynamic DNS service account to the "Dynamic DNS" settings. The setup process may require some troubleshooting, because the "Dynamic DNS" options vary depending on your router. Once configured, you can view the feed through a Web browser using the dynamic DNS address as the URL.
Wired And Wireless Camera Options
How and where you place the webcam depends on the way in which the device connects to the computer. Some webcams connect directly to the computer via a USB connection, whereas other connect to the network via Ethernet and Wi-Fi. The placement of USB-connected cameras are limited based on the cable's length, however you can add an extension to expand your options. Ethernet-connected cameras can go anywhere you run an Ethernet cable and don't require a separate power cable, which may make it easier to locate the camera based on the router location. Wi-Fi cameras broadcast over the network and need only a power connection to work, so they can be placed anywhere near an outlet.
- CNET: How to Set Up a Cheap Home Security System Using Dynamic DNS
- PC Advisor: How to Turn a PC or Laptop Webcam into a CCTV System for Free
- No-IP Support Center: How to Setup a Webcam and Access It From Anywhere
- PC Magazine Encyclopedia: Definition of: Network Camera
- Digi-Watcher: Free Downloads of Webcam Surveillance Software
- Yawcam: Download
- IP Webcam: IP Camera Adapter 2.0
- DeskShare: Download DeskShare Products
- ISpy Connect: ISpy works on Windows XP, Vista, 7 and 8
- No-IP: Create Your No-IP Account
- Dyn: Webhop
- DNS Dynamic: Check Domain Availability.