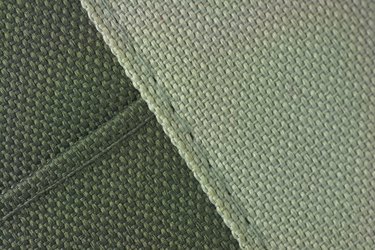
When you're compositing visuals in Adobe Photoshop for client or company projects, you balance optimizing the images you process with creating original elements for your montages and illustrations. Adding the look of a hand- or machine-stitched line required some laborious workarounds prior to the release of Adobe Photoshop CS6, which inaugurated the program's dashed and dotted line styles. With some effects and a filter to heighten the reality of your illusion, you can sew a fine seam using virtual thread.
Step 1
Press "U" to switch to the Adobe Photoshop Line tool. Set the unlabeled Tool Mode drop-down menu in the Options bar to "Shape." The tool draws regular unfilled paths or lines made up of pixels when you set it to its Paths or Pixels modes.
Video of the Day
Step 2
Set the fill color of your line from the swatches in the color selection panel that opens when you click on the "Fill" button in the Options bar. Choose the None swatch, a white square with a red line through it.
Step 3
Click on the Options bar's "Stroke" button to open another color picker from which to set the color of your line. You can use solids or gradients. Set the weight, or thickness, of your stroke using the unlabeled Stroke Width data field or drop-down menu.
Step 4
Open the unlabeled Stroke Type drop-down menu, also in the Options bar, and choose the dashed line style. Set the unlabeled Path Operations menu so the Line tool draws a new shape. Type a number in the "Weight" field to set the thickness of your line.
Step 5
Click at the top or left edge of your file to define the starting point of your virtual line of stitches. To create a line that traverses the entire width or height of your file, press "F" twice to enter Full Screen Mode With Menu Bar so you can see and access the full live area of your document. Click and drag from the area surrounding your document to set the starting point of the line outside the live area. Hold down the "Shift" key and continue dragging to define the length of your stitched line. When you release your pointing device, the line stops.
Step 6
Add Photoshop layer effects to your line to give it the dimensionality of real thread and to make it interact with the background behind it. Open the "Window" menu and choose "Layers" to reveal the Layers panel. Click on the unlabeled Layer Style button at the bottom edge of the Layers panel and choose "Bevel and Emboss." Select the Pillow Emboss style with a small size value to make your thread look rounded.
Step 7
Add more dimensionality to your virtual thread. Open the flyout menu at the top right corner of the Layers panel and select "Convert to Smart Object" so your line retains its vector mask after you apply a Photoshop filter to it. In the Photoshop toolbox, set your foreground and background colors so they represent the same hue you used for your line, but with slightly different brightness values. Open the "Filter" menu, locate its "Render" submenu and choose "Fibers." Choose a high Strength value with a Variance near the midpoint of its setting scale. Your digital thread gains a subtle fibrous appearance from the Smart Filter.
Video of the Day