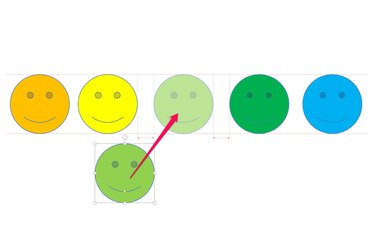
Centering pictures is a snap in PowerPoint 2013. To center one picture in a slide, use the guideline option available under the View menu, or have PowerPoint center it for you with its align options. To center multiple images, group them together first to center the group vertically and horizontally in the slide.
Centering a Single Picture
Video of the Day
Step 1
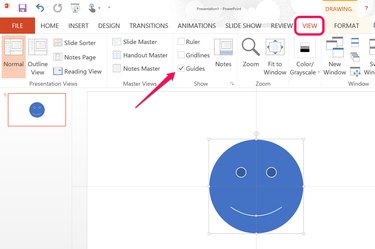
Click the "View" menu above your PowerPoint slide and click the "Guides" check box located in the Show group. This adds two guide lines to the slide, one centered horizontally and one centered vertically, which you can use to center a picture.
Video of the Day
Step 2
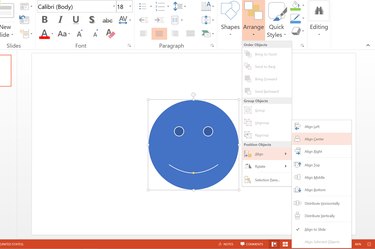
Select a picture that you want PowerPoint to center for you. Click the "Home" menu, followed by "Arrange" and then "Align." Select "Align Center" to center the picture horizontally in the slide.
Step 3
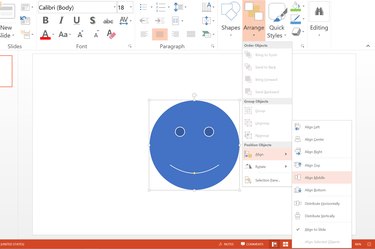
Select "Arrange" from the Home menu again, click "Align" and then click "Align Middle" to center the image vertically in the slide.
Centering Multiple Pictures
Step 1
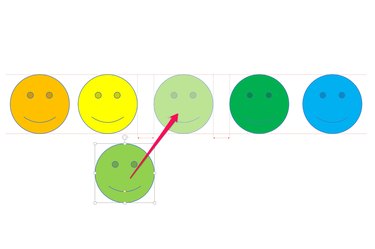
Select a picture that you want centered between two or more other objects. Drag the picture towards the center of those objects. Dotted lines appear on either side of the image indicating when it is centered. Release the mouse button to deposit the picture in the center of the other objects.
Step 2

Select two or more objects that you want centered in a PowerPoint slide. If you try to align them as they are, PowerPoint piles the pictures on top of each other, so group them first. Right-click any of the selected pictures, click "Group" and then click "Group" again.
Step 3
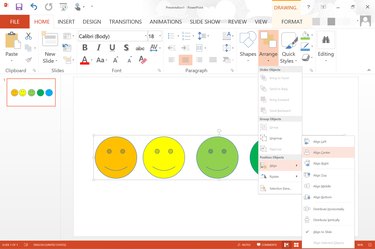
Center the group of pictures horizontally by selecting "Arrange" from the "Home" menu, clicking "Align" and then clicking "Align Center." Select "Align" again and then click "Align Middle" to center the pictures vertically.
Step 4
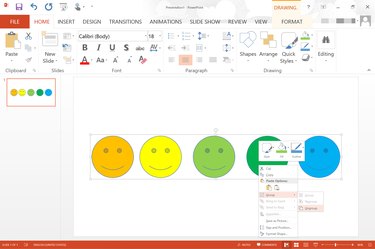
Ungroup the pictures at any time by right-clicking them, selecting "Group" and then "Ungroup." Even when they're ungrouped, the pictures remain centered until you move one of them.