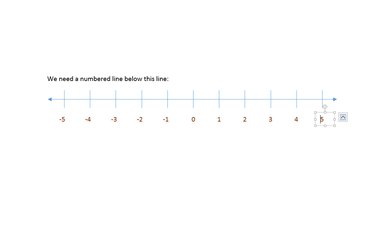
Microsoft Word 2013 does not have a built-in number line that you can insert, nor are there any templates with number lines. To create a number line in your Word document, first create an arrowed line using the Shapes feature, add tick marks and numbers, and then format as you wish.
Create the Line With Tick Marks
Video of the Day
Step 1
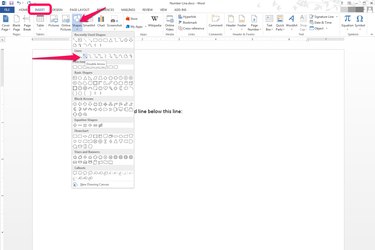
Select "Shapes" from the "Insert" tab and select the Double Arrow line.
Video of the Day
Step 2
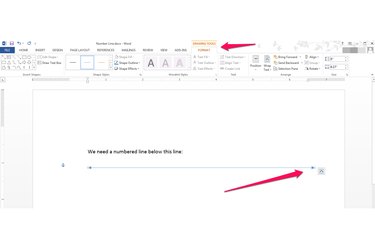
Hold down the "Shift" key to keep the arrow straight and drag across the page to create a horizontal line. The Drawing Tool Format panel opens.
Step 3
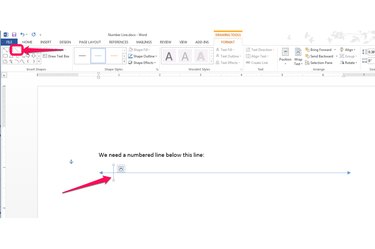
Select the plain line in the Insert Shapes group. Place your cursor where you want a tick mark on your line, hold the "Shift" key, and drag to create a vertical mark. Holding the Shift key ensures a straight line.
Step 4
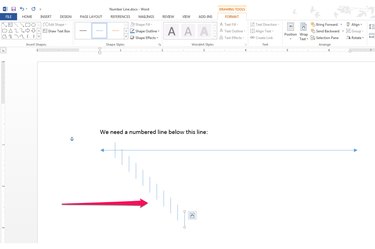
Select the tick mark. Your cursor displays as crosshairs when selected. Press "Ctrl-C" to copy the tick mark and then "Ctrl-P" to paste it. Repeat "Ctrl-P" to paste as many tick marks as you need on the line. The marks will paste in a staggered, vertical design.
Step 5
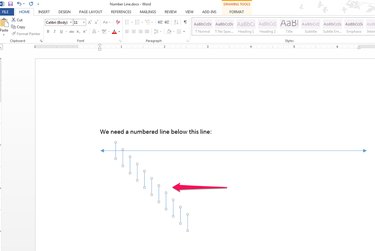
Select all the tick marks by holding "Shift" and selecting each one. As you select each mark, the cursor becomes a crosshairs. This process may be easier if you place your cursor just slightly to the right of each mark
Step 6
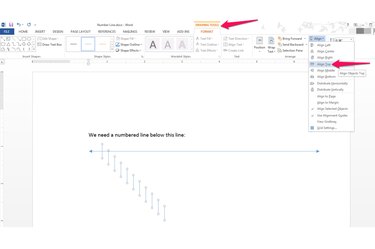
Ensure that the Drawing Tools Format tab is active, select "Align" from the Arrange group, and then choose "Align Top" from the drop-down menu. Each tick mark aligns along the line.
Step 7
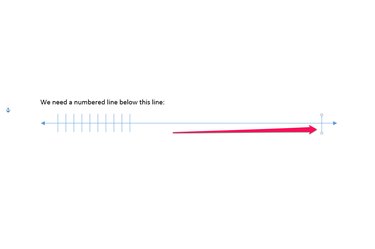
Drag the right-most tick mark to a point at the end of the line where you want your last number.
Step 8
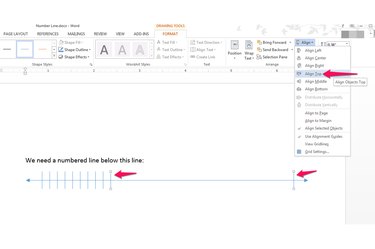
Realign the right-most mark; it is likely no longer precisely top-aligned. Select one mark on the left, hold the "Shift" key, select the right-most mark, select "Align" from the Arrange group, and then choose "Align Top" from the drop-down menu. It is important to first select a mark on the left and then select the right-most mark because Word aligns all selected objects based on the first one selected.
Step 9
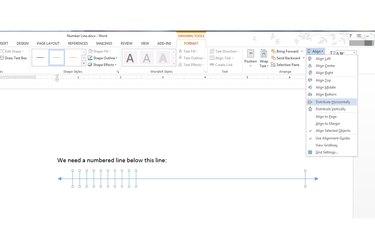
Distribute the marks horizontally along the line: Select all the tick marks again by holding the "Shift" key, select "Align" and then "Distribute Horizontally." Word distributes the tick marks evenly across the line. You are now ready to add the numbers.
Add the Numbers to Complete the Number Line
Step 1
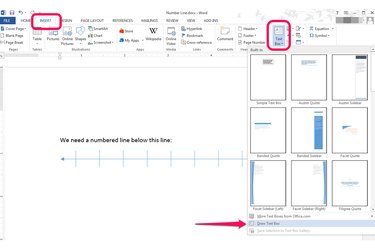
Select the "Insert tab," choose "Text box" from the Text group, and select "Draw Text Box." The cursor becomes a cross hairs.
Step 2
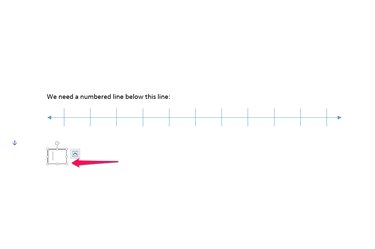
Drag across and down to create a box anywhere on the page and then deselect the cursor. You'll note an icon on the right that, if pressed, reveals a text box formatting drop-down menu. Leave this alone.
Step 3
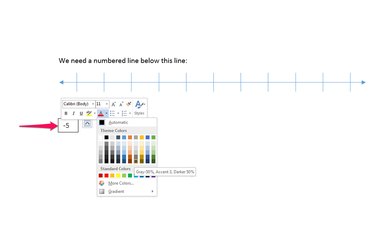
Enter the number with which you want to begin your number line. Select it to display a formatting pop-up. Format the font using any of the options -- to change the color, for example.
Step 4
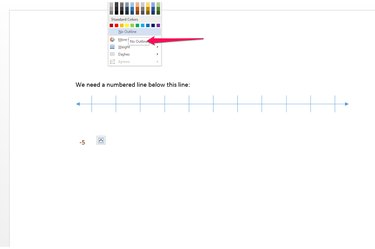
Deselect the text box by clicking anywhere else in the document. Re-select it by double-clicking to display the Drawing Tools Format tab. From the "Shape Outline" in the Shape Styles group, select "No Outline" to remove the visible outline around the text box.
Step 5
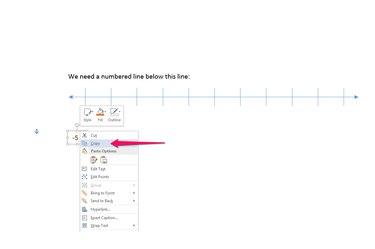
Right-click the text box and press "Ctrl-C" to copy it. Paste it using "Ctrl-P," repeating "Ctrl-P" as many times as necessary so you have a number for every tick mark.
Step 6
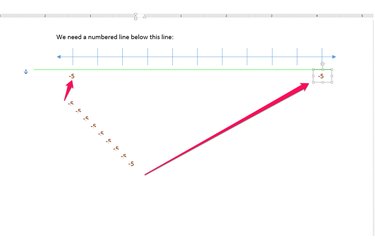
Select the left-most number and drag it into place underneath the left-most tick mark. It does not have to be perfect at this point -- just approximate where you want it. While dragging it, Word displays a green guideline to help you align it. Then, move the right-most number to drag it underneath the right-most tick mark.
Step 7
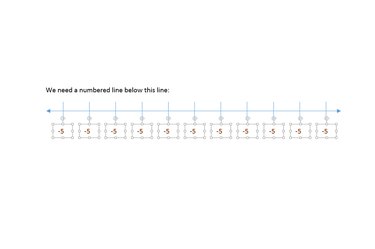
Align the text boxes. First, select all the text boxes and then choose "Align Top" followed by "Distribute horizontally" from the Arrange group on the Drawing Tools Format tab. The numbers should align nicely directly under the tick marks.
Step 8
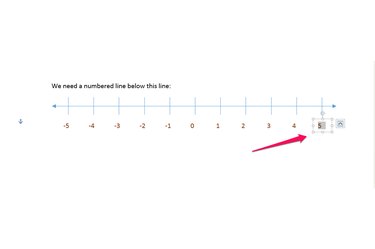
Edit each number to reflect the number you want on the number line. Double-click inside each text box to select the text inside the box -- rather than the box itself -- and change the number.
Step 9
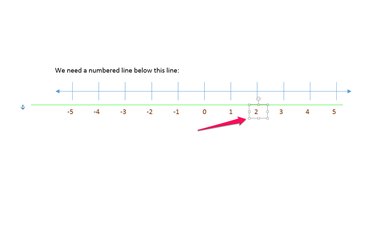
Make any necessary adjustments to the text box alignment using the arrow keys on the keyboard -- if you have a mix of single and double digits that have resulted in misalignment, for example. Select the text box and then use the right, left, up or down arrow keys on your keyboard to precisely place the number.
Step 10
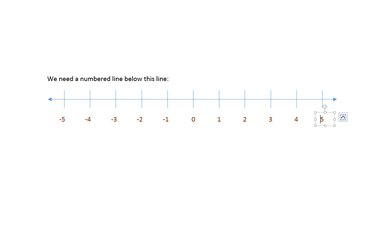
View the completed number line.