
In Microsoft Word, you can add a colorful frame to any picture by customizing a picture border. If your aim is to print the photo, use a page border instead. Page borders have many more options than picture borders so you'll be able to create a frame that suits your picture best.
Adding Frames to Inset Pictures
Video of the Day
Step 1
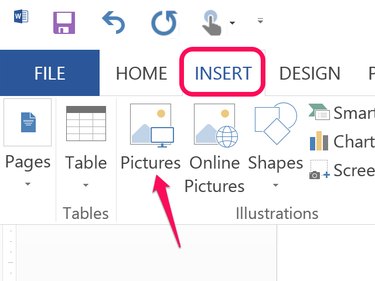
Place the cursor where you want the image to appear in a Word document. Click the Insert tab and select Pictures to add an image from your computer. To find a picture online, click Online Pictures and enter a keyword using Bing's image search.
Video of the Day
Step 2
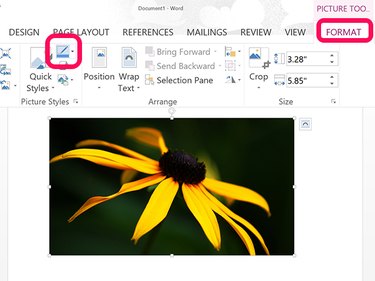
Resize the image as needed by dragging a corner. Click the Picture Tools Format Tab and then click the Borders icon in the ribbon's Picture Styles group.
Step 3
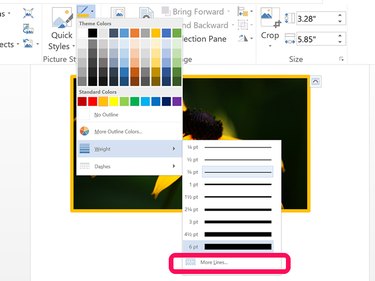
Select a color for the frame and click Weight. While you can select a frame width here, the thickest available is only 6 pt. Click More Lines to open the Format Picture menu, which gives you more options.
Step 4
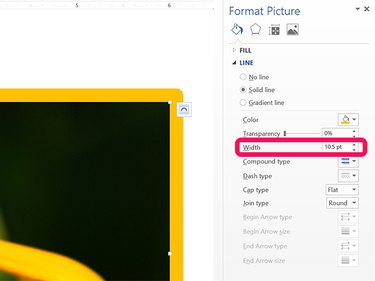
Click the Width menu and set the frame's thickness. Note that you can also change the color and line style. You can choose a gradient frame, make the frame semi-transparent and change the style of the corners using the Cap Type and Join Type menus.
Adding Frames to Full Pages
Step 1
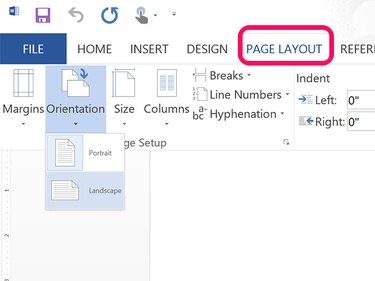
Open a new blank Word document. Click the Page Layout tab to set the page orientation, set the margins and adjust the page size as needed. If the photo you want to frame is wider than it is tall, for example, change the orientation to Landscape.
Step 2
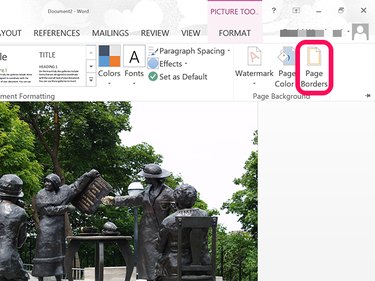
Click the Insert* menu, select Picture and select a photo. Drag the corner of the picture to fill the entire page. If the picture doesn't quite fit, go back to the Design tab and adjust the page size. Click the Picture Tools' Format menu and select Page Borders.**
Step 3
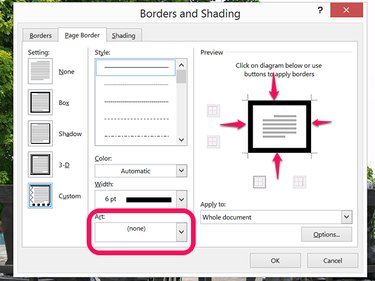
Click all four sides of the Preview thumbnail to create a frame around the page. Scroll through the Art menu to see the dozens of frame options included with Word. These include everything from different line styles to flowers, if you don't see something you like using the Style, Color and Width options.