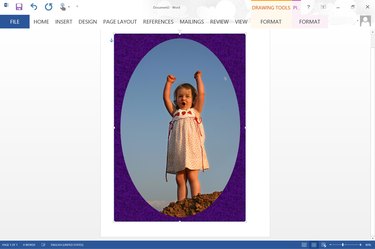
Using the picture and shape editing tools available in Word 2013, you can transform any image into a different shape, including an oval that appears to be inset into a frame. First, crop the image into an oval shape. Once that's done, any shape you place behind the photo will make it look like its been framed.
Cropping an Oval Photo
Video of the Day
Step 1
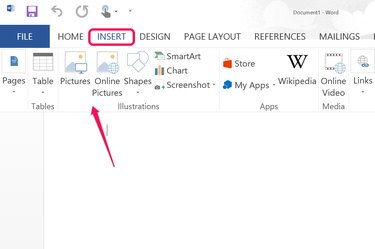
Open a document in Microsoft Word. To add a photo, click the "Insert" menu. To add a photo from your computer, select the "Pictures" icon in the ribbon. Select "Online Pictures" to get a photo using Bing Search, OneDrive or from the Office.com Clip Art gallery.
Video of the Day
Step 2
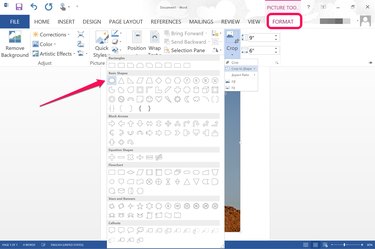
Select the photo in the document to make the Format menu beneath Picture Tools appear. Click the "Format" menu, then "Crop" and select the "Crop to Shape" option that appears in the drop-down menu. Clicking the "Oval" in the list of shapes crops the photo into an oval.
Step 3
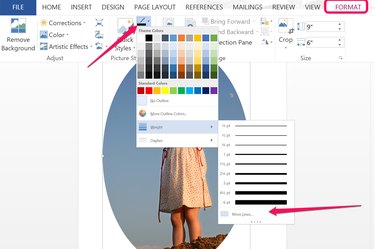
Add a border to the oval photo if you want by clicking the "Picture Border" icon located in the Picture Styles group of the Format menu. A thin border can look like matting when you apply a rectangular frame around the photo. A thick border can serve as a frame itself. To change the border's thickness, click the "Weight" menu in the Picture Border's drop-down menu and then click the "More Lines" option.
Putting a Frame Around the Photo
Step 1
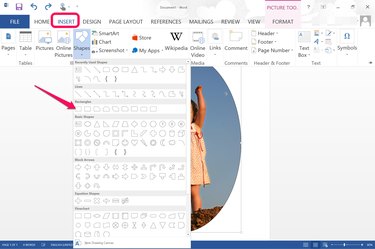
Click the "Insert" menu, select "Shapes" and then choose any shape to serve as a frame for the photo. Select the "Oval" in the Basic Shapes section to have a frame that is round on the outside, or the "Rectangle" if you want the outside corners square. In both cases, of course, the inside of the frame will be oval.
Step 2
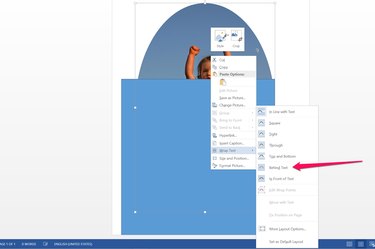
Drag the the corner "Handle" to resize the rectangle as needed so it is larger than the photo. At this point the rectangle covers the photo, so right-click the rectangle, select "Wrap Text" and click the "Behind Text" option. This pushes the rectangle behind the photo.
Step 3

Right-click the photo again to change its color. Select "Fill" and choose any color in the palette that opens. If the color you want isn't displayed, select "More Fill Colors." You can also add a gradient or texture to the frame using the options in this menu.
Step 4
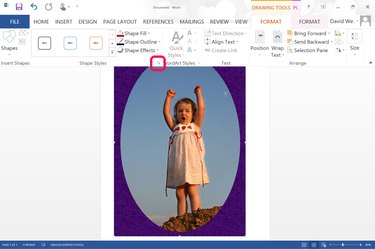
Click the Drawing Tools "Format" menu while the rectangle is still selected and then click the Shape Styles "Dialog Box Launcher." This opens the Format Picture menu with additional formatting options.
Step 5
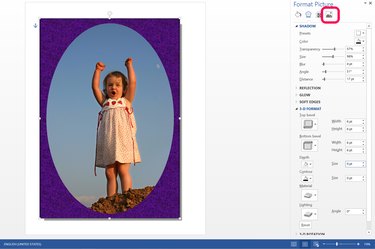
Click the "Picture" icon at the top of the Format Picture menu if it's not already selected. Click "Shadow" to add a drop-shadow to the frame. You can also add a reflection beneath the frame, a glow, soft edges or 3D effects like bevels or lighting changes using the options available in this menu.