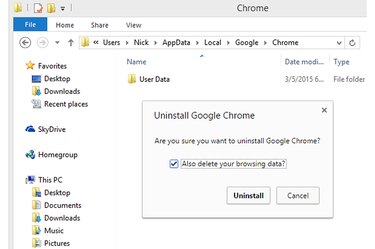
Completely reset Google Chrome 41.0 by uninstalling it from your Windows 8.1 or 7 computer, deleting all its folders and files and then reinstalling it. You can't delete everything using the Reset option on the Chrome Settings page -- bookmarks and passwords are not erased. If a program you recently installed is altering Chrome or preventing the browser from working as it should, uninstall the program before resetting Google Chrome. When you uninstall the browser and erase all leftover files, everything -- including bookmarks, passwords, extensions, history and site data -- is erased.
Step 1
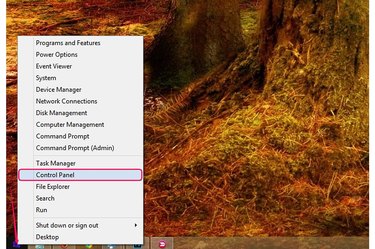
Right-click the Windows logo in Windows 8.1 to expand the Power User menu and select "Control Panel" to launch the utility. In Windows 7, click the Start button and select "Control Panel."
Video of the Day
Step 2
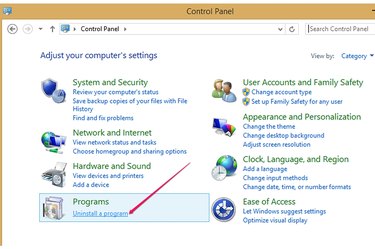
Select "Uninstall a program" from the Programs section to open the Uninstall or Change a Program section of the Control Panel -- all programs installed on your computer are listed there.
Step 3
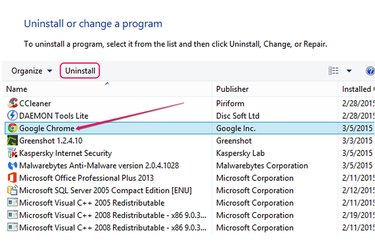
Select the "Google Chrome" program and click the "Uninstall" button. If you didn't close Chrome, the uninstaller prompts you to close it; click "Uninstall" again after you do so.
Step 4
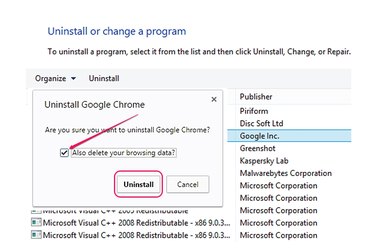
Check the "Also delete your browsing data" box and then click the "Uninstall" button to remove Google Chrome from your computer. The process may take up to a minute.
Step 5
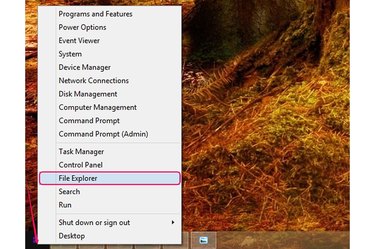
Select "File Explorer" from the Power User menu in Windows 8.1 to launch the utility. In Windows 7, click the Start button and select "Computer."
Step 6
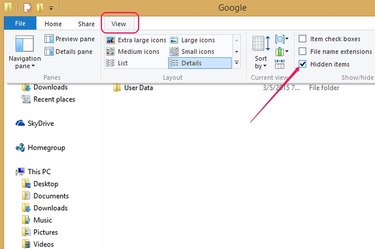
Switch to the "View" tab in File Explorer and check the "Hidden items" box in the Show/Hide group to display hidden files and folders.
Step 7
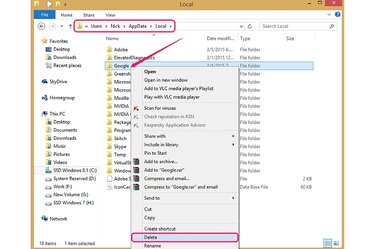
Open the "C:\Users\Your_Username\AppData\Local" folder, right-click the "Google" folder and select "Delete." Confirm your action to delete the folder. If the partition that contains the Windows operating system has a different letter, replace "C" with the correct letter.
Step 8
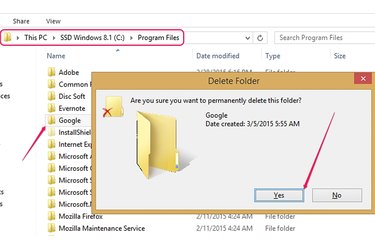
Open the "Program Files" folder on the system partition and delete the "Google" folder. To delete a folder without sending it to the Recycle Bin -- to permanently delete it -- hold "Shift" and press "Delete."
Step 9
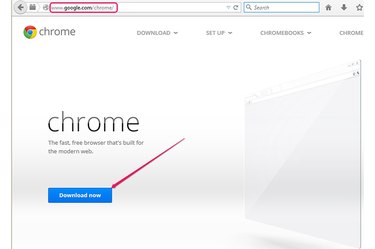
Open the Google Chrome Web page and click the "Download now" button.
Step 10
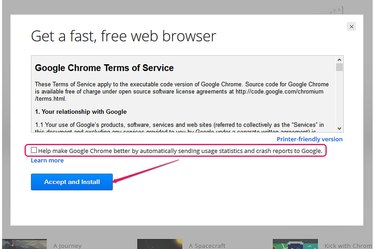
Click "Accept and Install" to accept the Google Chrome Terms of Service and download the application. Check the "Help make Google Chrome better..." box if you want to send usage statistics and crash reports to Google automatically.
Step 11
Double-click the installer to download and install Google Chrome on your computer. The process is completely automated and usually takes less than a minute. Follow the instructions to make Chrome the default Web browser and log in to your Google account if you want to sync data across multiple devices.
Video of the Day