Using Microsoft OneNote, you can set up to-do lists for any group of tasks you may face and give them due dates. To add due dates, beyond simply typing the date beside the task name, you can link the task to Outlook or create a custom tag with a unique icon to signify its importance.
Set Up a To-Do List
Step 1
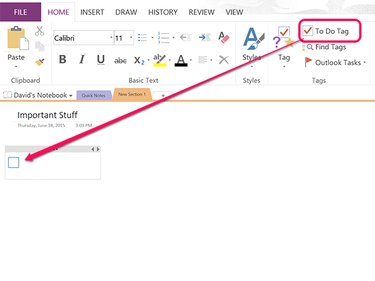
Open a new page in OneNote by pressing Ctrl-N. Place the cursor where you want the to-do list to begin, click the Home tab and then click the To Do Tag icon.
Video of the Day
Step 2
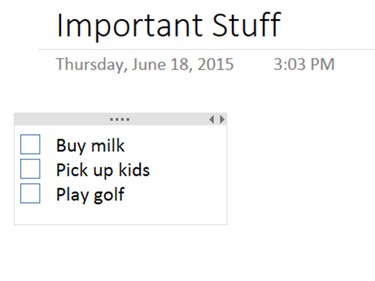
Type a description for the first task. When you press Enter, OneNote automatically adds a new to-do tag at the beginning of the next line. When you get to the end of your list, press Enter twice to stop OneNote from adding any more tags.
Step 3
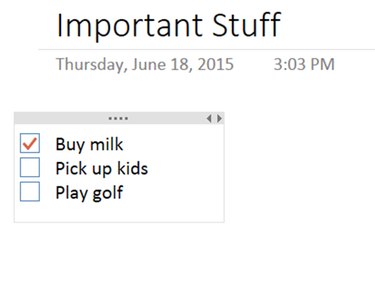
Click a To Do Tag to put a check mark in it. Click it again to clear the check mark.
Connecting OneNote to Outlook Tasks
Step 1
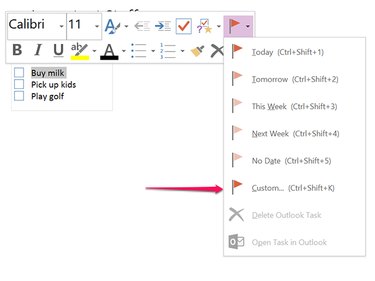
Right-click an item in your to-do list and then click the Flag icon. Alternatively, place the cursor in the to-do list item and click the Outlook Tasks icon in the Home ribbon. From the drop-down menu select when the item should be due, to create a task in Outlook. If you click Custom, a new Outlook task window opens that you can configure the task exactly as if you created it in Outlook itself.
Step 2
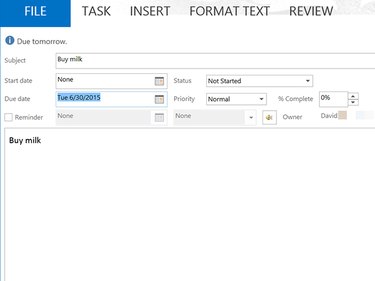
Customize the Outlook task, including a start and end date, as well as a detailed description. Click the Reminder check box if you want Outlook to notify you before the task is due.
Step 3
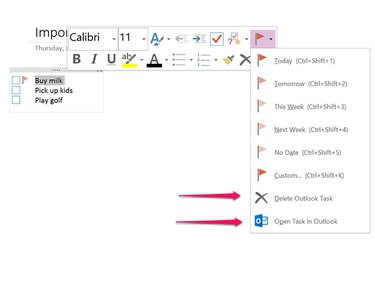
Make changes to a linked Outlook task in Outlook or in OneNote. To edit or remove the linked task from OneNote, right-click the item in the to-do list, click the Flag icon and select Open Task in Outlook to edit it, or Delete Outlook Task to remove it.
Customizing a Tag
Video of the Day
Step 1
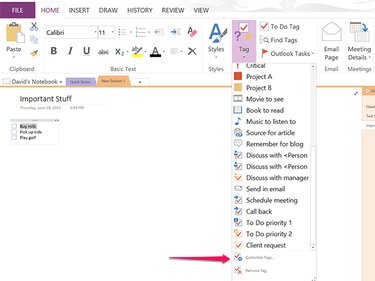
Click the Tag icon in the Home ribbon. Select the Customize Tags from near the bottom of the drop-down menu. Click the New Tag button.
Step 2
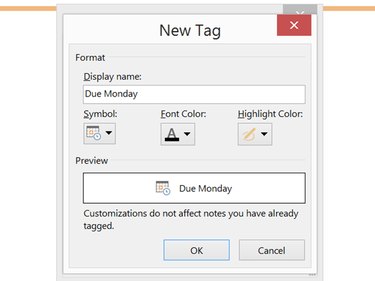
Enter a name for the tag that indicates it's due-date. If you create a new tag for every day of the week, you can reuse the same tags. Select a symbol from the Symbol menu, then change the Font Color and Highlight Color to something that will always get your attention. Click OK to save the new tag.
Step 3
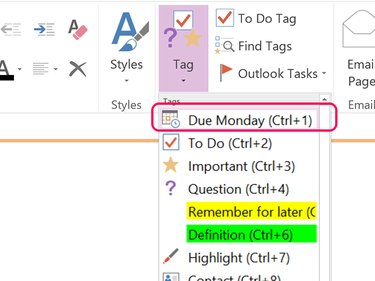
Place the cursor in the item that you want to tag, then click the Tag icon in the Home ribbon again. Click the new tag, which appears at the top of the drop-down menu.
Step 4
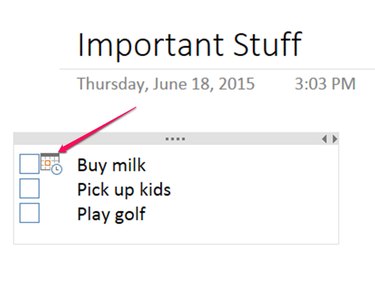
Hover the cursor over the icon to see the date you entered as a title. To delete the tag, right-click it and select Remove Tag.