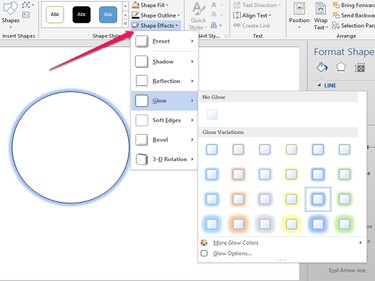
Adding shapes to a document can draw attention to something you want to emphasize. Draw a circle in Microsoft Word 2013 using the tools in the Insert tab. Whether used alone or in combination with other shapes, a circle draws the attention of the reader.
Step 1
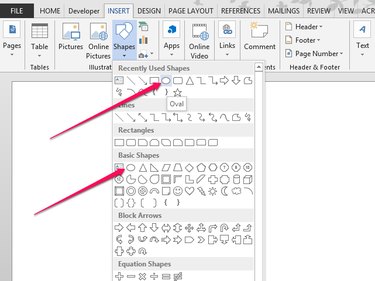
Place the cursor where you want the circle. From the Insert tab, click Shapes and choose the Oval.
Video of the Day
Step 2
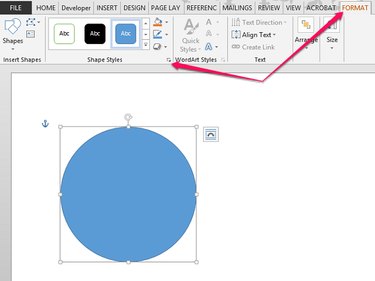
Press and hold the Shift key to constrain the shape to a circle. Click on the circle and hold while you drag the shape to the desired size. The tab automatically changes to the Format tab. You can fill the circle with a color, change the color and width of the line, and add effects from the Format tab. To see additional options, click the arrow to expand the Shape Styles menu.
Step 3
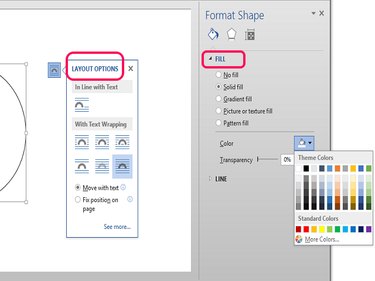
Use the Layout Options menu to choose how the circle appears in relation to text. Use the Fill menu to choose colors and styles inside the circle. Click on a selection in either menu to apply it to the circle.
Step 4
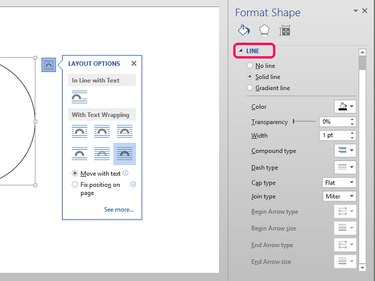
To select Line options, click the arrow next to Line to expand the Line menu. When you click a selection, the change is automatically applied to the circle.
Step 5
If you want to add effects, click Shape Effects to view the drop-down menu. Expand any option by clicking the arrow next to it. Just like the other options, when you click on a feature, it is applied to the circle.
Step 6
If you want text within the circle, double-click anywhere in the circle and a cursor appears. Type the text and press Enter when finished.
Video of the Day
