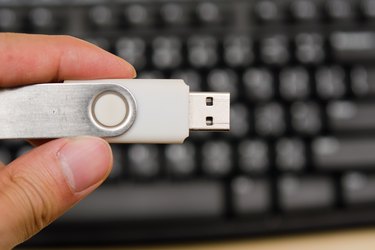
Transferring a pre-recorded program from a Verizon FiOS DVR to a computer isn't as difficult as it might sound; anyone with some basic background in computers and electronics shouldn't have a problem with the process. DVRs, or Digital Video Recorders, will eventually run out of space, making a computer flash drive a viable option for long-term storage. The other advantage of making the transfer is portability: a flash drive can fit into a pocket, whereas DVRs aren't built for mobility.
For a PC
Video of the Day
Step 1
Locate your computer's Firewire (or 1394) port. This will be a rectangular port with two slanted corners, similar to but wider than a USB port.
Video of the Day
Step 2
Connect the Firewire cable to the Firewire port. This will only fit one way. Insert the other end into one of the Firewire ports on the Canopus ADVC 110 (either will do).
Step 3
Connect the RCA audio/video cables to the Analog In ports on the Canopus ADVC110. These will be three round ports color-coded yellow, red and white, and will be labeled "Input." Insert the wires into the ports by color. Locate identical ports on the back of your Verizon FiOS DVR, and connect the other ends of the RCA audio/video cables to these ports. Set the Canopus ADVC110 to Analog In by pressing the button on the front; the Analog In light will illuminate.
Step 4
Launch Windows Movie Maker. This program can be found in the general programs or Accessories folder. Choose to import video from a camera, and select the Canopus ADVC110.
Step 5
Start the program on your DVR at the same time you choose to begin the video import. Stop both once the program is complete.
Step 6
Finalize your video. Your video will appear in the center of the screen. Drag it down to the lower left-hand corner, and drop it there; this is the timeline, and the program uses this area to create the movie. Then, on the left side of the screen, choose to save to your computer. Windows Movie Maker will convert the video to a usable file; once completed, the program will let you know.
Step 7
Insert your flash drive into a USB port on your computer. Open it by opening My Computer, then clicking on the Removable Storage that appears (usually the E: or F: drive). Drag your video from the computer onto the flash drive. Eject the drive by right-clicking on it, then choose Eject. This will help to preserve the flash drive's contents.
For a Mac
Step 1
Locate your computer's Firewire (or 1394) port. This will be like a USB port, but more square with a plastic insert sticking up from one of the long ends, like a tooth.
Step 2
Connect the Firewire cable to the Firewire port. This will only fit one way. Insert the other end into one of the Firewire ports on the Canopus ADVC 110 (either will do).
Step 3
Connect the RCA audio/video cables to the Analog In ports on the Canopus ADVC110. These will be three round ports color-coded yellow, red and white, and will be labeled "Input." Insert the wires into the ports by color. Locate identical ports on the back of your Verizon FiOS DVR, and connect the other ends of the RCA audio/video cables to these ports. Set the Canopus ADVC110 to Analog In by pressing the button on the front; the Analog In light will illuminate.
Step 4
Launch iMovie. This program can be found on the dock or in the Applications folder. Then choose to import video from a camera, then select the Canopus ADVC110.
Step 5
Start the program on your DVR at the same time you choose to begin the video import. Stop both once the program is complete.
Step 6
Finalize your video. Your video will appear in thumbnails on the lower part of the screen. Select them all, then drag them to the upper left-hand corner. This is the timeline, and it's from here that the program will create your movie. From the Share menu, choose to Export Movie, then choose the size you want (the larger the video, the larger the file size will be). iMovie will let you know when the conversion is complete.
Step 7
Insert your flash drive into a USB port on your computer. Open it by opening a new Finder window, then clicking on the Removable Storage that appears (usually the E: or F: drive) on the left side menu. Drag your video from the computer onto the flash drive. Eject the drive by clicking on the Eject icon next to the drive (usually a triangle above a square). This will help to preserve the flash drive's contents.