Because Microsoft Outlook integrates your email, calendar and contacts, sending a meeting request can be a pretty straightforward task. Simply entering the names of the people you're inviting, the time and the location, and pressing the Send button will get the job done. However, Microsoft has packed a lot of additional features into this task, which can enhance your meeting request, especially if your office uses Microsoft Exchange.
Step 1
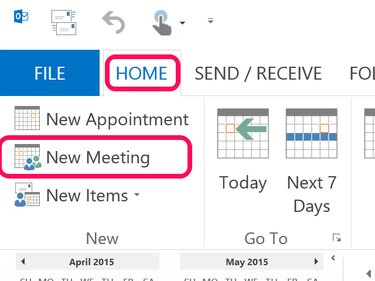
Launch Outlook and click the Calendar icon at the bottom of the left menu. From the Calendar Home tab, click the New Meeting icon. To create a new meeting from wherever you are in Outlook, you can also press Ctrl-Shift-Q.
Video of the Day
Step 2
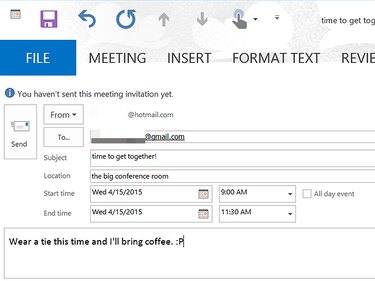
Enter the meeting particulars in the appropriate fields. Place your cursor in the Subject field and type a name for the meeting. Select the Location field and type an address, building or room. Click in the Start time and End tim" fields and specify the start and end times of the meeting. Alternately, select the All Day check box for events that last 24-hours, from midnight to midnight of the specified dates. Select the Message field at the bottom of the dialog box if you need to type an appropriate message for the invitees.
If your office uses Microsoft Exchange, you may also have a Rooms option, so you can see if a specific room is available and reserve it for your meeting.
Step 3
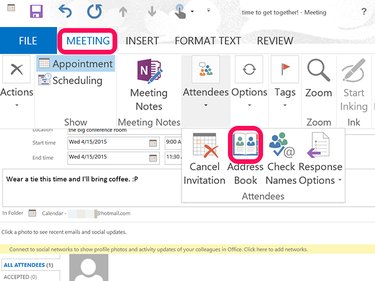
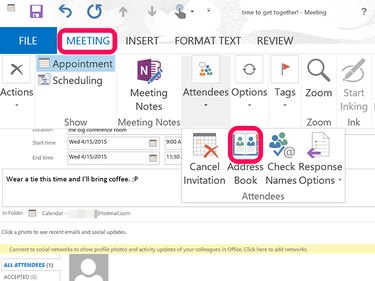
To enter the names of the people you want to invite, select the To field. If anyone is not already in your Outlook Contacts, you can simply enter their email addresses. To open your address book, click the Meeting tab, select Attendees and click Address Book.
The Attendees menu also gives you the option to cancel a scheduled meeting and specify response options for recipients, which includes giving recipients the ability to propose a different time for the meeting.
Step 4
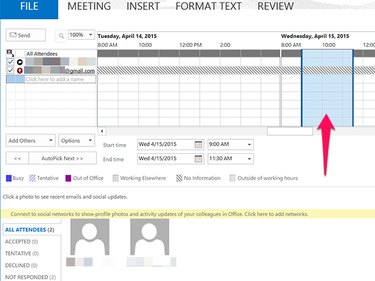
Click the Schedule icon just below the Meeting icon under the Home tab if you want to verify that the meeting suits your schedule. The calendars of the recipients may also appear if you are on the same Exchange network and if you have permission to view their calendars.
If you are an Exchange user, click Scheduling Assistant to find the best time and place to meet based on the recipients' schedules and room availability.
Step 5
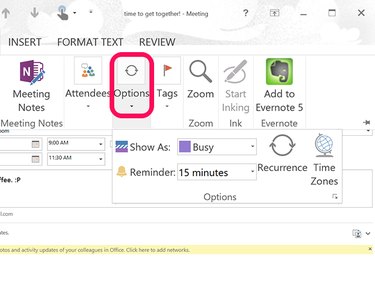
Click the Options icon under the Meeting tab to select how you want the meeting time to appear on your calendar. The additional options here also let you set a meeting reminder and specify if the meeting will be recurring or not, such as for setting weekly or monthly meetings.
Step 6
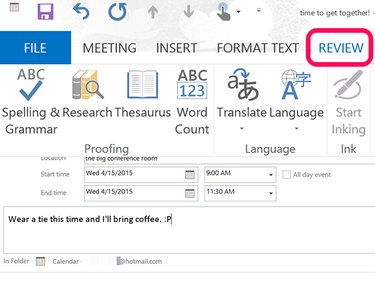
Click the Review tab to check spelling and grammar in your meeting request. Note that the additional options here give you the ability to translate the request into other languages, as well as to check time zones and even to access a thesaurus.
Video of the Day