Upgrading to a new Windows 8.1 computer doesn't mean you have to leave your emails behind. If you use a Microsoft or Windows Live account to send and receive mail in Windows Live Mail, you can transfer mail, contacts and calendars to your new computer simply by signing into Windows Live Mail using your Microsoft or Windows Live ID. If you use an alternate email service or don't have an Internet connection, transfer mail messages and contacts manually using the Export tool in Windows Live Mail.
Transfer Using Microsoft or Windows Live Account
Video of the Day
Step 1
Launch Windows Live Mail on your new computer, click the "Home" tab and click the "Sign In" button.
Video of the Day
Step 2
Enter your Microsoft or Windows Live ID and associated password in the provided fields. This must be the same Microsoft or Windows Live ID you used in Windows Live Mail on your old computer.
Step 3
Press the "OK" button to sign in. Transfer of your mail, contacts and calendars begins automatically. This method works only for emails, contacts and calendars associated with this particular Microsoft or Windows Live account. If you use multiple email accounts in Windows Live Mail on your old computer, you must transfer mail and contacts from those accounts manually.
Transfer Mail Manually
Step 1
Create a new folder on your old computer so that Windows Live Mail has a place to export your mail. For instance, to create a new, empty folder on the desktop, press "Ctrl-E" to launch File Explorer, click "Desktop" under the Favorites heading, click the "Home" tab and select "New folder."
Step 2
Launch Windows Live Mail, click the "File" menu, select "Export email" and then click "Email messages."
Step 3
Choose "Microsoft Windows Live Mail" as the file format, click "Next," then "Browse" and select the desktop folder you created earlier.
Step 4
Click "Next," select all of the email folders you want to export and click "Next" again to initiate the file export process. Press "Finish" when the export process is complete.
Step 5
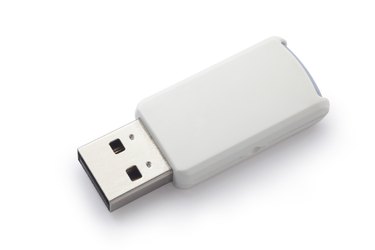
Connect a USB key or external hard drive to your computer. Open File Explorer again and drag and drop your exported email folder from the desktop onto the USB key or hard drive. Eject the device once the files are copied, and then connect the USB key or hard drive to your new computer.
Step 6
Launch Windows Live Mail on your new computer, click "File" and select "Import messages."
Step 7
Select "Windows Live Mail" on the list of file formats, click "Next," then "Browse" and select the folder on your USB key or hard drive containing your exported emails.
Step 8
Click "Next" and then click "Finish" to complete the transfer of your Windows Live Mail messages onto your new computer.
Transfer Contacts Manually
Step 1
Select the "Contacts" folder in Windows Live Mail on your old computer and then click the "Export" button on the ribbon.
Step 2
Select "CSV" as the export file type, browse to the location on your computer where you want to save the exported contacts file, enter an identifying name for the file and then click "Save."
Step 3
Click "Next," select which fields you want to export and press "Finish."
Step 4
Connect a USB key or external hard drive to your computer. Press "Ctrl-E" to open File Explorer and drag and drop your exported CSV file onto the USB key or hard drive. Eject the device and connect it to your new computer.
Step 5
Launch Windows Live Mail on your new computer, select the "Contacts" folder and click "Import" on the ribbon.
Step 6
Select the "CSV" file type, click "Browse" and select the CSV file on your USB key or hard drive.
Step 7
Click "Next," place check marks next to each of the contacts' fields you want to import and then click "Finish" to finish transferring your Windows Live Mail contacts to your new computer.
- Windows: How Do I Import and Export Email, Contacts, and Calendars with Windows Live Mail?
- Windows: How Do I Sign in with a Microsoft Account to Use it with Windows Live Mail?
- Windows: How to Work with Files and Folders
- Windows: Do I Need to Sign In with a Microsoft Account to Use Windows Live Mail?