Create your own banners for birthdays, holidays or other celebrations using Microsoft Word 2013. There are a lot of good banner templates available for Word, so check those out first. If you can't find one with the background you like, creating a banner from scratch takes only a minute or two longer. After you print the banner, you'll need some tape to assemble the pages.
Creating the Banner
Video of the Day
Starting With a Template
Step 1: Find a Template
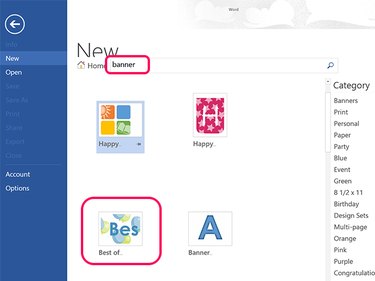
Launch Word, or click the File tab and click New if Word is already open. Type "Banner" in the Search field and then select a template with a background that you like. Click the Create button in the Preview to open the template for a new document.
Video of the Day
Step 2: Customize the Text
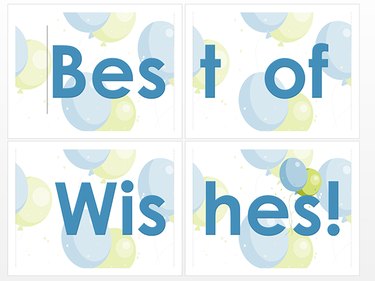
Enter the words that you want for your banner. Delete any words in the template that you don't want.
Step 3: Choose Font Options
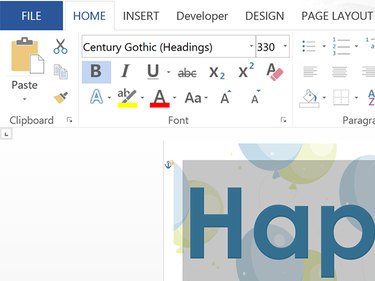
Highlight the text. Click the Home tab to change the font, font color, or to adjust the font size. You can now start adjusting the layout to prepare your banner for printing.
Starting From Scratch
Step 1: Create a New Document and Choose Page Layout
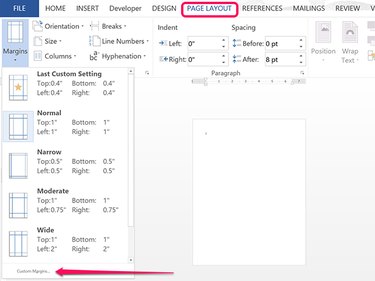
Open a new Word document and click the Page Layout tab. If you have paper in your printer larger than letter-size, click the Size icon and select that paper. Click the Margins icon and then Custom Margins at the bottom of the drop-down menu.
Step 2: Set the Margins and Page Orientation
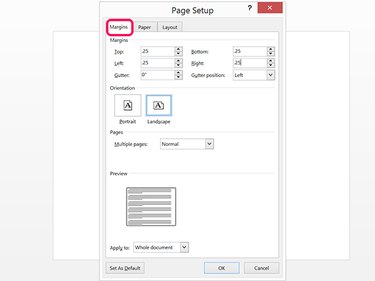
Enter the smallest margins that can be used with your printer. For most inkjet printers, this is about 0.25 inches. Select Landscape orientation for a banner that's 8.5 inches high on a letter-sized printer. Leave the orientation at Portrait for a banner that's 11 inches high -- but will require more pages, more layout adjustments and more taping after it's printed.
Step 3: Add an Optional Watermark Image
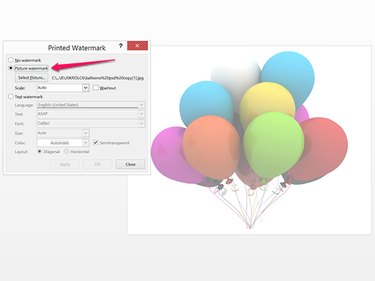
Add an image to the banner by clicking the Design tab and clicking the Watermark icon. In the Printed Watermark window that opens, click the Picture Watermark option and then the Select Picture button. Choose a picture from your computer or from Bing Image search. Once inserted, this image will be repeated on every page of the banner.
Step 4: Choose Font Options
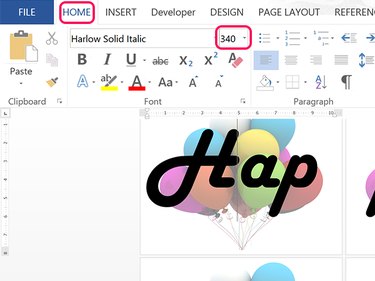
Click the Home tab and select a Font and Font Color for the banner. The font size you choose depends on the font, paper size and paper orientation. To get started, type 340 in the Font Size menu, type a few letters and then adjust the size if needed. Type all of the words for your banner. The layout won't be perfect yet, but you'll fix that next.
Adjusting the Layout
Step 1: Choose the Alignment
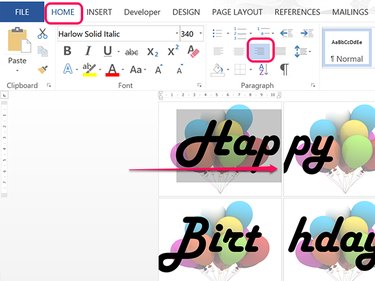
Adjust the alignment of the partial words on each page so that they are close to the rest of the word. For example, if the first page reads Hap and the next page reads ppy, the first page should be right-aligned and the second page should be left-aligned.
Place the cursor at the end of the first partial word, press Enter and then highlight the letters. Click the Home menu and then click the Left or Right Alignment button. In our example, the pages containing Hap and Birt should be right-aligned. The second half of each word should be left-aligned.
Step 2: Adjust the Character Spacing
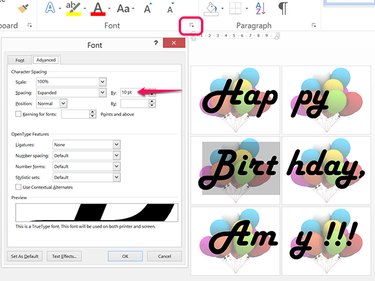
Adjust the horizontal spacing of partial words to spread the letters over the page if desired. To do this, highlight the letters, click the tab and then click the small Arrow at the bottom of the ribbon's Font section. In the Font window, select Expanded from the Spacing menu and then enter a value in the By field, such as 10 pt. You may have to increase or decrease this value, depending on how much spacing you require. Click OK, see how it looks on the page and then try a different value if needed. While there is a preview in the Font window, the font is likely too big for this preview to be of much help.
Step 3: Adjust the Margins to Ensure Proper Printing
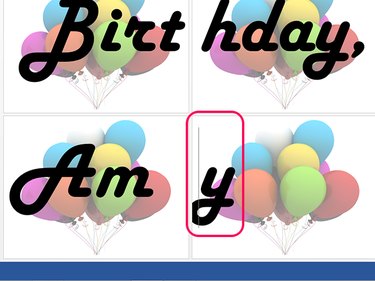
Look at the edge of each page for any letters that overlap the margins. In the screenshot here, the letter y in Amy is beyond the margin and won't print properly. Place the cursor in front of the letter and enter a Space. Having letters fall outside of margins seldom happens in Word 2013, so this may just be a symptom of having extremely large text.
Step 4: Add Extra Space or Punctuation if Necessary
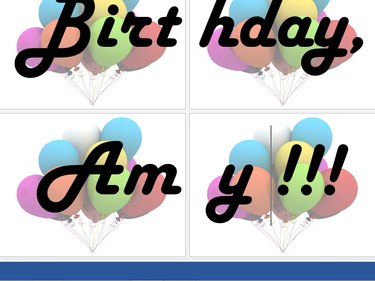
Fill in extra space by adding a space between words or by adding an exclamation point or three at the end of the banner. Proofread the banner carefully. Having words spread across two or more pages can make it hard to spot a typo.
Step 5: Display and Confirm Your Settings
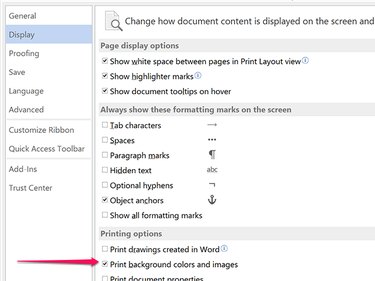
Click the File tab, select Options and then click Display. Make sure the Print Background Colors and Images is enabled in the Printing Options section. Click OK to save the settings.
Step 6: Print the Banner
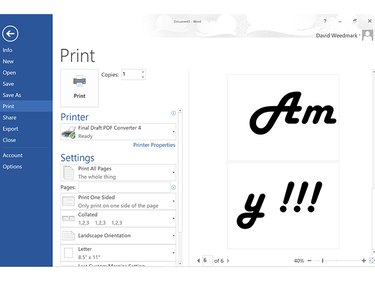
Click the File tab and select Print. Even though the background image doesn't appear in the Print Preview, it will print if the Print Background Colors and Images option is enabled. Print the first page as a test and then print the remaining pages. Tape the pages together, and your banner is ready for use.